
本教学为翻译教学,转载请注明来自aboutcg.net,以及注明翻译者
原文教学出自Corey Dawson Hall的个人网站,原始链接如下:
http://stochasticity.cdawson.tv/tutorial-dynamic-modelling-in-c4d-using-mograph/
作者: Corey Dawson Hall
翻译:SO
转载请写明出处和翻译者为SO,谢谢。
Dynamic Modelling in C4D Using MoGraph
如何使用C4D制作动态滚动文字条
Does your client want “that light grid look from all of the music videos a little while back”? FINE…but you need to scroll a bunch of text through it…which means you need to be able to switch in new text on the fly. PROBLEM…until now. You would have to fake the lights using some sort of animated texture map. That’s not a bad solution until you need to get CLOSE to the lights and then they’ll end up looking like crap. Using the Volume Effector from C4D’s MoGraph module you can model dynamically, leaving your text in a procedural generator (Text Object), ready for changes.
In the first part of this tutorial we’ll go through the theory and setup the basic MoGraph model and get it running. In part two, we’ll work on actually modeling the lights and the rig to get a good-looking final model.
你的客户是否希望得到上面图片中的那种使用灯光阵列显示影片文字?很好。。。不过你需要额外制作一些 滚动的字幕在上面。。。这时问题来了,你很可能一直以来都使用动态纹理贴图的方式来伪造灯光字幕。这样做远看还不错,然而当图像放大时就会发现这种伪造的 灯光问题超级多。。。使用c4d中的效应器你可以根据你的文字形状和位置让你的模型动起来。
在这个教学的第一部分,我们来学习mograph模型的一些基础操作。在第二部分,我们将实际使用这项技术去制作一个细节丰富的光阵文字成品。
STEP 01: The Bulb
步骤一:灯泡
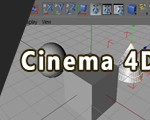
Create a simple sphere object and make it very small. We’ll also reduce the number of segments to something low so we won’t slow down our viewport.
创建一个非常非常小的球体。这时最好将球体的分段数调小一些,否则一会会很卡。
STEP 02: The Rig Holding the Light
步骤二:基本结构
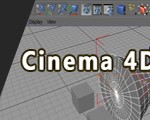
Create three cylinder objects and offset them behind our sphere.
在球的后面创建三个柱体,位置如图。
STEP 03: Grouping the Objects Properly
步骤三:打组设置
Select the sphere and group it alone by pressing Option+G
选择球体,并单独对球体打组。
Then add the three cylinder objects into the group. (This is important so that our axis center for the group remains at the sphere’s center.)
然后再将三个柱体放到组中去。这步很重要,因为这样做可以让组的中心点保持在球体的中心。
STEP 04: Matrix Object
步骤四:矩阵对象
Create a matrix object from the mograph menu. (You could just use a cloner object, but we are going to be linking multiple cloner objects from this matrix object, so if we need to change any of the characteristics of the matrix object, it will update in both of our cloner objects.)
创建一个matrix物体。(这个矩阵物体将用来简化我们控制克隆物体间距与数量所需要的操作。)
STEP 05: Cloner Object
步骤五:克隆对象
With our bulb group selected, create a cloner object while holding down option (this will make the new cloner object a parent of the bulb group). Under the cloner object’s attribute settings change the mode to object and drag the matrix object into the object dialog box.
NOTE: After creating the cloner object, I realized that my cylinders we too fat and short. I changed their settings a bit. (this is why procedural objects are great!)
选择之前创建好的组,然后创建一个cloner物体。在cloner物体的属性设置中将模式改为object,然后拖拽matrix物体到当前面板中的物体对话框中,并将other选项卡空的是否可见勾选上。
通常状况下,你需要按照当前显示的结果回去调整下圆柱体与球体的长宽高数值。
STEP 06: Our Text
步骤六:创建文字
Create your normal text object with a text spline and an extrude nurbs. In the extrude nurbs settings change the movement to 0m. We just want plain flat text.
创建一串你喜欢的字体,然后extrude出来。需要注意的是,这个例子中我们extrude的字体可以没有厚度。因为我们只是想用这个字体的形状来规定显示哪些灯不显示哪些。
STEP 07: “Lights On”
步骤七:灯光设置
Duplicate our cloner object and then delete all of the cylinders. Also make the radius of the sphere smaller than that of our bulbs. (These spheres will be the bright spot inside the bulbs that are “on”)
复制我们的克隆物体并把复制出来的克隆物体中所有圆柱体删除。
然后把仅剩下的球体半径减小一些。(我们用这些小球在之前做好的半透明灯阵中模拟发光)
STEP 08: Volume Effector
步骤八:体积效应器
With our new cloner still selected, create a new volume effector from the Mograph menu. In it’s settings, drag the text’s extrude nurbs object into the volume object dialog box. At the bottom of the attribute menu check the Visibility checkbox to on. (This will make it so our “on” bulbs only show up where the text intersects with our matrix objects (kind of like a boolean object, all of the other “on” bulbs will be hidden.)
确保我们的克隆物体处于被选择状态,这时去mograph菜单新建一个volume效应器,将积压物体拖拽到效应器设置窗口中的object物体对话框中。然后将下面的visibility可视化选项勾选上。
现在可以很直观的看到当前克隆物体只显示那些字体形状内的小球了。
STEP 09: Some simple textures
步骤九:简单材质设置
First we’ll make a transparent texture for the outer bulbs (use a Fresnel shader for more realistic transparency. Then make a luminescent texture for our “on” lights.
Apply them to our objects and hit render. We’re done. We now have a lighting grid that we can still edit whatever text is being illuminated.
首先我们为最开始克隆物体中的大球(灯泡)制作一个半透明材质球
(tips: 使用fresnel着色器可以使透射看上去更加真实)
然后再创建一个发光材质给之后制作的用来显示字体的小球体。
到此,灯光矩阵滚动字幕就已经制作完毕了。用这种方法你可以随时随地的修改字幕文字。
In part two, we’ll work on giving the bulbs, lights, and rack models a little more detail to add some style. I hope you’ll check it out.
本教学的第二部分将带领大家完成灯泡形状,灯光,以及诸如此类的一些细节,没啥实际意义,所以本教学的译者so对本教学的翻译工作就到此打住了~希望大家喜欢。
有问题可以参与答疑












4回复如何使用C4D制作动态滚动文字条"