
翻译:层层(本站翻译小组成员)
原文:http://www.cgarchitect.com/2013/06/the-making-of-3drp-6
Posted by Jeff Mottle
作者:Jeff Mottle
uan Gayarre Calvo from GAYARRE infografía was the recent winner of the 3D Render Party 6 Competition. He’s created a detailing Making Of of his winning image for CGarchitect.
来自GAYARRE infografía 的Jeff Mottle是最近一期3DRP 6比赛的获奖者。他为CGarchitect网站制作了获奖作品的详细解析教程。
INSPIRATION
灵感来源
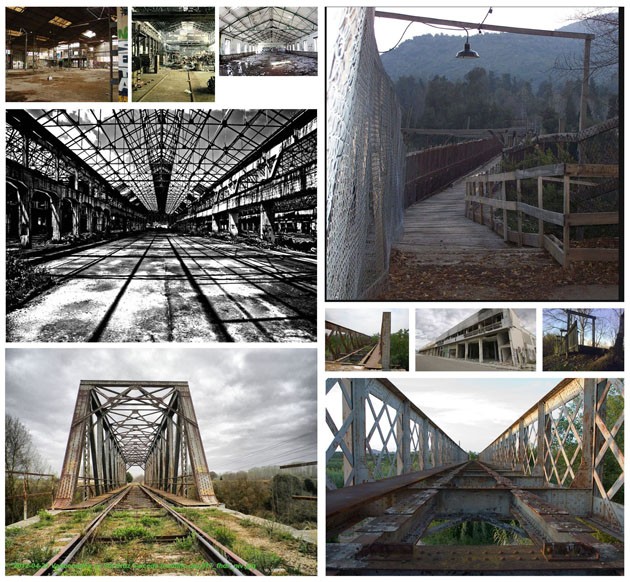
Once we chose the point of view and the aspect of the scene, we set out to search for reference images, which help us to get as close as possible to the final idea.
在选取视角和场景方向时,我们搜索了很多参考图片,这可以帮助我们接近最终想要的效果。
The fundamental keys of our image were the deterioration and the abandonment of the scene. We were looking for images that showed a feeling that we could apply to our scene. The first search was made on bridges or similar locations with some deterioration.
这幅图的关键在于场景给人的堕落、被遗弃的感觉。我们寻找可以把感觉应用于我们场景的图片。所以我们首先寻找的是桥或者有堕落感觉的近似场景。
We think it could be a habitable place for animals who often use this type of place for nesting, like crows, vultures, etc.
我们觉得这将是一个适合于乌鸦、秃鹫这一类动物经常筑巢的地方。
So, this was the second Internet search.
所以,这是第二次搜索的成果。
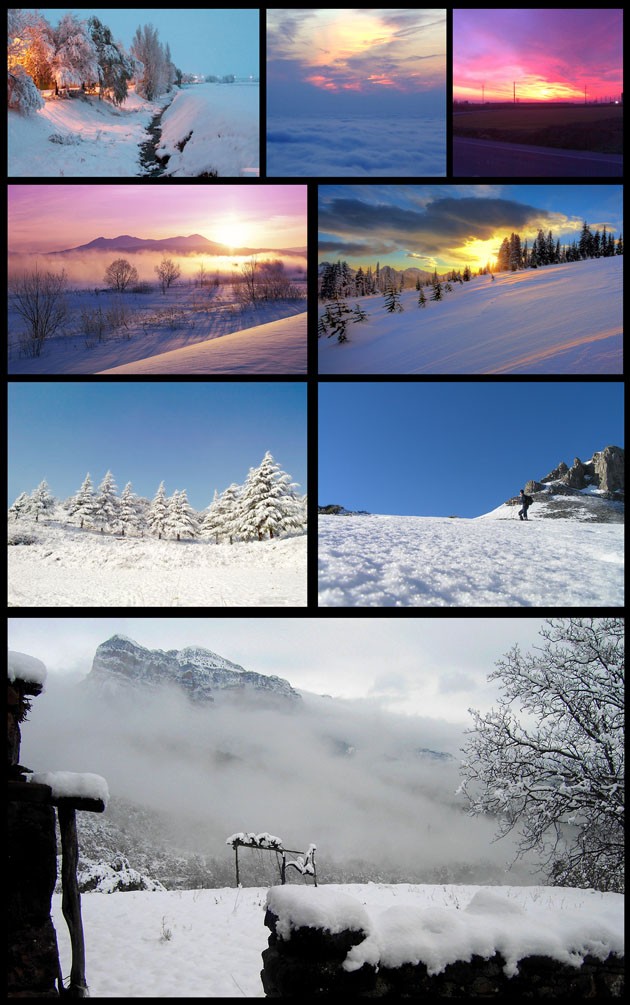
After deciding that the scene would be lit with a night or evening ambiance with snow, we made a third and final search, searching dusk sunset skies, and places where the snow is present.
在确定了要使用有雪的夜晚场景之后,我们进行了第三次搜索,收集了有黄昏落日的天空和有雪的场景。
MODELLING SNOW
雪的建模
For snow creation, we used a plugin for Cinema 4D: MagicSnow.
http://nitro4d.com/blog/freebie/magic-snow/
我们使用C4D的MagicSnow插件做雪。
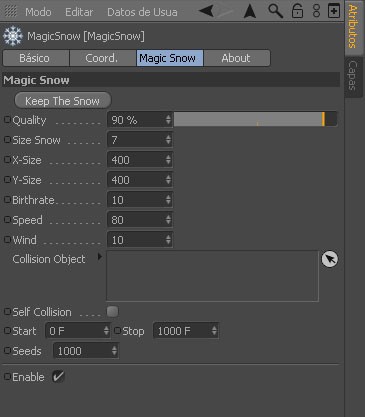
Defaults settings for Magic Snow
Magic Snow的基础设置
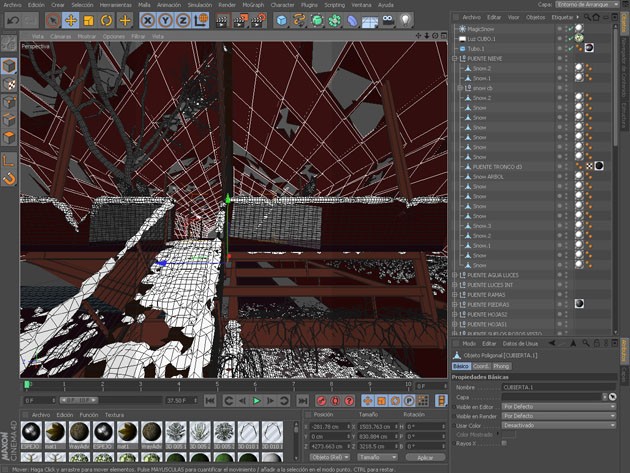
This plugin had advantages and disadvantages. The advantages were obvious, it brought something different to the scene. The big drawback was that we had to wait a long time, as the snow fills the scene in real time. There wasn’t something like an airbrush to paint snow in the scene. We had to put snow on the different objects in the scene to see how they would appear. We also had an additional problem because the snow uses pure and simple geometry. Our computers did not like it if we tried to do the whole scene at once.
这个插件优缺点并存。优点显而易见,它丰富了场景。但是它最大的缺点是耗时很长,因为雪是按照真实时间填充到场景里的。没有喷枪可以绘制雪。我们必须将雪放到场景中的不同物体上来观察雪的形态。还有一个问题是,由于雪使用的是纯粹的简单几何体,当我们试图一次性为整个场景添加雪的时候,我们的计算机并不适应。
We had to make it snow in pieces and then adapt the final snow geometry to the scene. The snow in the background could be less in quantity, resolution and definition.
我们必须一块一块的做雪并最终整合到场景中。背景部分的雪会有更低的质量、分辨率和清晰度。
Finally we were able to fill the scene after multiple tests, as we did not always chose in the right values. Mainly because it was a novelty for us to use this plugin for the first time.
This video was very useful for us to understand the process:
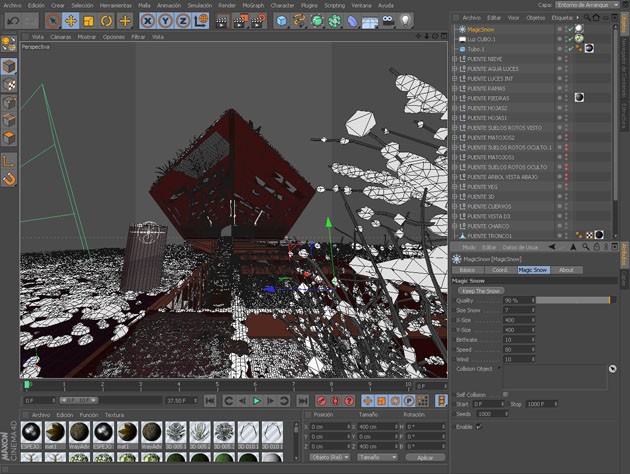
Some screenshots of the snow process:
虽然我们偶尔会选错数值,但是经过多次测试,我们最终为场景加上了雪。
这主要是因为我们还是第一次使用这个插件,一切都很新奇。
做雪过程中的截屏:
PUDDLE
水坑制作
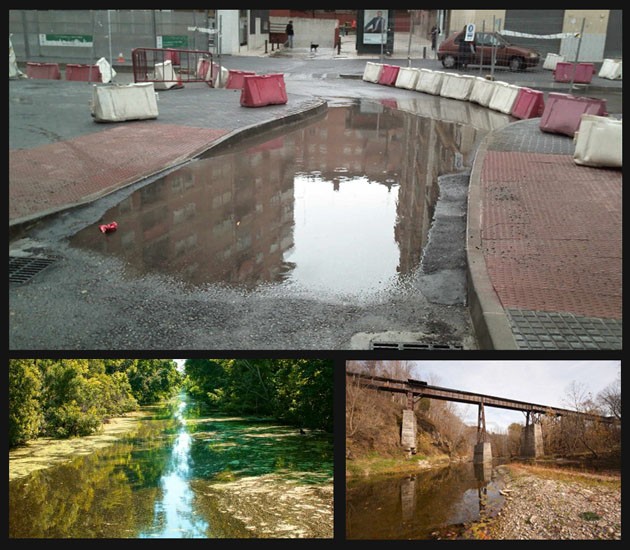
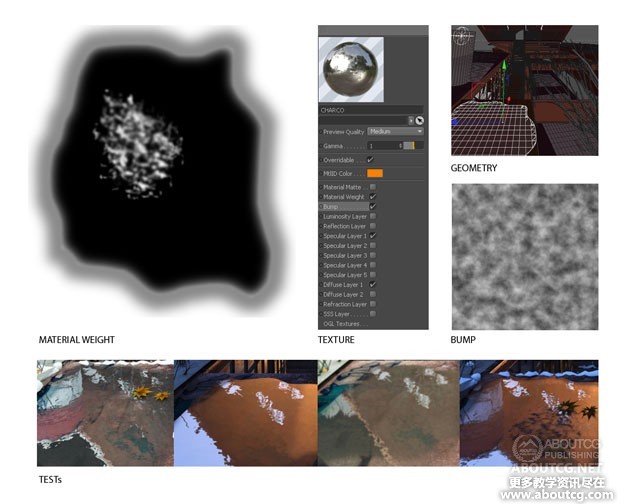
Initially the puddle was an element that was going to have some prominence, because we wanted to put it in the foreground. Its inclusion in the surroundings, along with its reflection, diffusion, etc., would make it an attractive element in the scene. We sought photographic references to get ideas.
从一开始,水坑就是一个重要的元素,因为我们要把它放在前景。它包含的对于周围环境的反射和漫反射等将会使它在场景中很显眼。我们搜集了照片作为这一想法的参考。
We used geometry and tried to to replicate reality as much as possible.
我们使用几何体,并尽可能的还原真实场景。
VEGETATION
植被制作
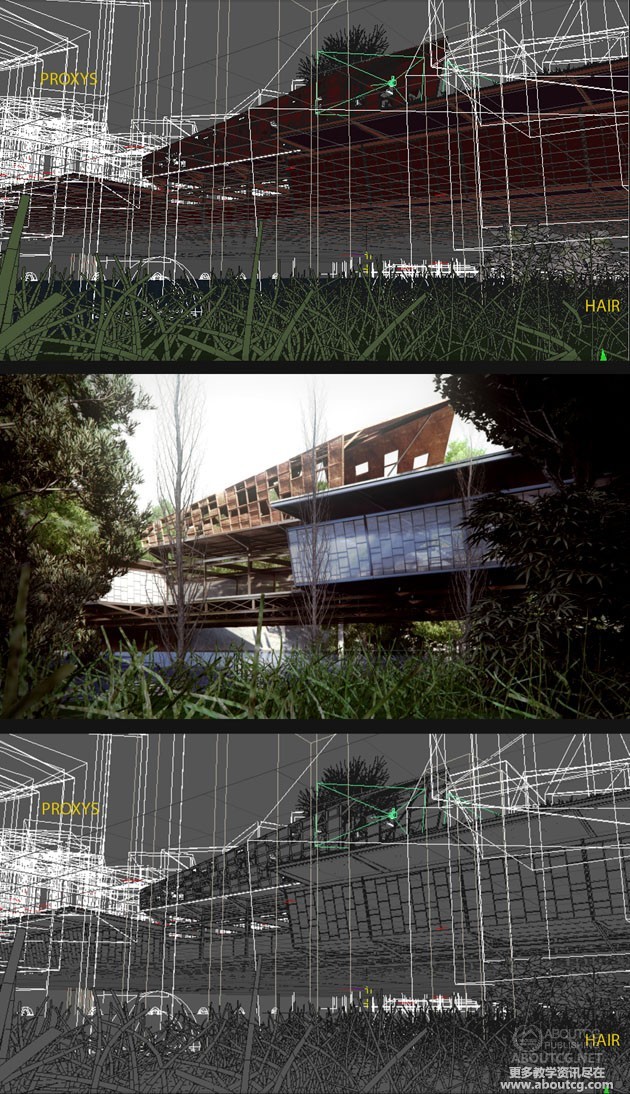
Regarding the issue of modeling vegetation, we used “hair” in Cinema4d, proxies for trees and simple 3d models for the dry trees.
植被我们使用C4D的“毛发”系统来制作,树用代理,枯枝用简单的3D模型。
Background trees were placed in post-production. During the process, many vegetation tests were conducted.
背景中的树是后期加入的。在整个过程中,我们做了很多植被的测试。
(hair毛发,proxys代理,model模型)
The trees were placed back in post-production, because we obtained more control, and we avoided having to place snow on that many trees, and also reduced the polygon count.
后期加树的好处是我们可以更好的控制它们,可以避免在很多树上放雪,还可以减少面数。
We kept a large percentage of foliage and shrubs. Unfortunately most of them were hidden by snow.
我们做了大量的树叶和灌木,但是大多数都被雪挡上了。
SINGULAR 3D MODELS
特殊的3D模型
A number of elements were custom modeled for the scene.
有一些元素是为场景定制的模型。
BIRDS
鸟
We decided to place the crows perched on the bridge deck and generated renderings from different viewpoints.
我们决定让乌鸦栖息在桥板上,并且多角度渲染。
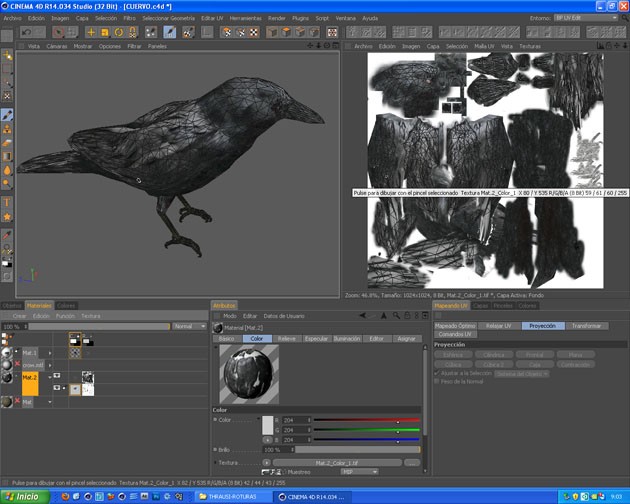
We generated a specific UV map for this model. The object is sectioned into “slices” and these are used as a canvas to “paint” on the texture obtained from several photos. The realism is good close up. In the end the model is a bit off, but all the details increase the realism of the final image.
模型的UV被细致展开。物体被分成很多“切片”,它们像一个画布一样允许我们将照片“画”成材质,得到很真实的效果。最终的模型有一点儿糟糕,但是所有这些细节都增加了最终图像的真实性。
DRY LEAVES
枯叶制作
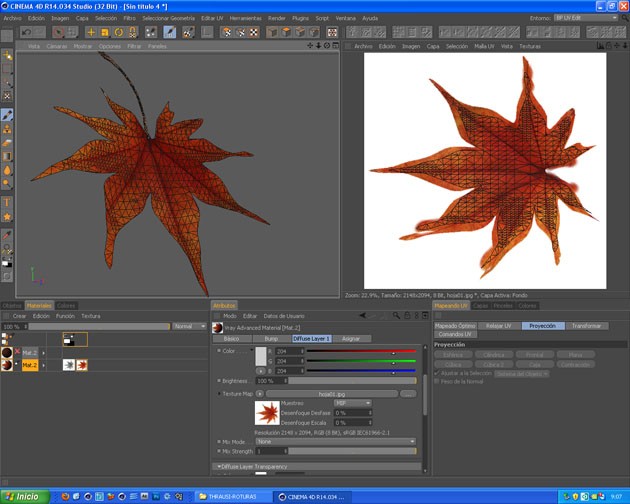
As with the crow model, we used UV maps to texture the leaves. Later, we adjusted to the model. We used a projection canvas floor as a guide.
与乌鸦模型一样,我们展UV为叶子添加材质,然后整合到模型上。我们使用projection canvas floor(一种映射方式)作辅助。
With the 3d paint brushes in C4D we directly retouched it into the camera perspective to tune.
我们使用C4D的三维笔刷修正贴图使之与摄像机角度吻合。
“BREAKING” THE BRIDGE
制作桥面破损
The bridge was modeled and modified slightly to give it an old weathered look.
为桥做简单的修改,使之有破旧风化的感觉。
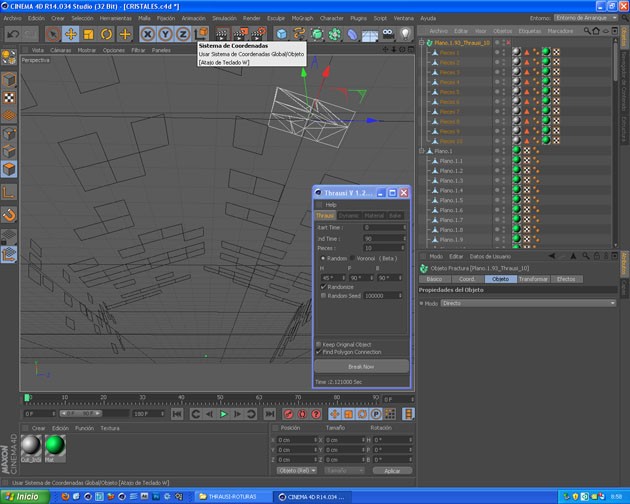
We first modelled all the glass areas, then using the Thraussi plugin, we broke it. It generates random cuts in the model, but unfortunately the number of polygons exceeded the power of our computer. We thought that we could gain time and realism.
我们一开始建了所有的玻璃平面,用Thraussi插件将它们破碎。在模型中产生了很多碎块,但是不幸的是,模型的面数超过了计算机的承受范围。我们认为要花更多的时间使之更真实。
We modified the top rail stairs manually to create breaks and folds.
我们修改了上部的楼梯,手动增加破损和裂痕。
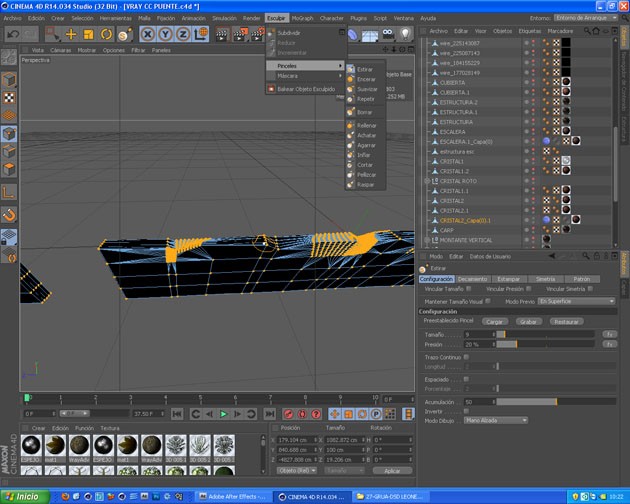
We used a tool that appears in the latest version of Cinema 4d and previously was found in other organic modeling applications: “SCULPT”. With this tool we could bend and soften the cuts and create dents.
我们使用了一个在最新版C4D中出现的工具,它在之前的其他建模软件中也出现过:“SCULPT(雕刻)”。我们可以用这个工具弯曲、柔化切面,创建凹痕。
We made major breaks manually and then refined the details later.
我们手动添加主要的破损,稍后添加细节。
In the creation process we used several options, but some of the elements didn’t appear in the final image.
我们做了很多,但是其中一些没有在成图中出现。
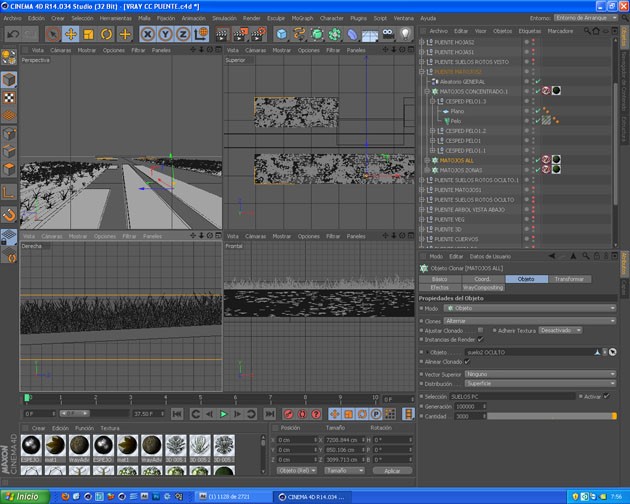
In a version with less snow, the surrounding soil appeared full of small bushes and stones. We used the MoGraph, a tool to multiply and distribute copies of an object. We modeled three or four stones and three or four bushes. With the aid of this tool, we randomly copied them on the ground.
在一个雪很少的版本里,周围地上有很多小的灌木和石头。我们使用可以复制分散物体的工具MoGraph。我们创建三四块石头和三四个灌木丛。在这个工具的帮助下,我们在地上随机摆放复制出的物体。
We used several polygon selections on the ground to make it even more random (mostly to avoid overloading the file by placing elements only where needed).
我们用一些多边形区域使石头和灌木更随机(主要是将元素放到我们需要的地方,避免文件超负荷)。
TEXTURES
材质贴图
Due to the aspect ratio of the image, there were several items that required some special attention during texturing. Some of them were in the background or they had less prominence in the end, but they are there and we think they worked well.
由于图像尺寸的原因,有一些物品的材质需要格外用心。它们中的一些可能在背景中,或者并不那么重要,但是我们觉得它们为画面添彩。
One of them was the puddle mentioned above and others were the drum, graffiti, the crows etc.
之前提到的水坑就是其中一个,还有桶、涂鸦、乌鸦等。
DUST BIN
垃圾桶
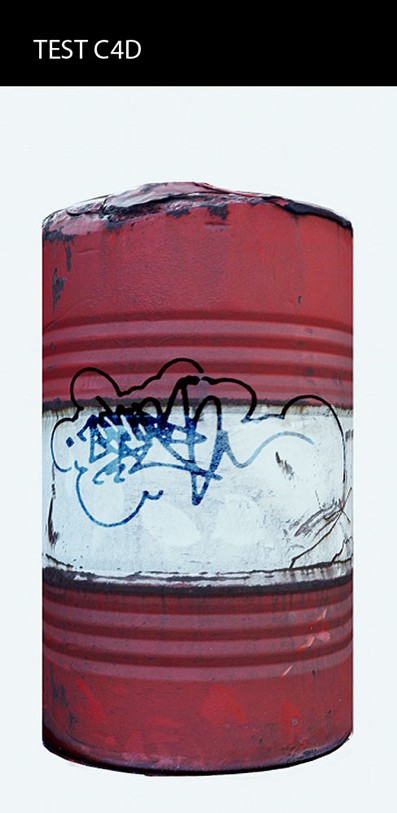
The drum was an added element at the last minute. Its texturing was based on finding an original picture and a model adaptation.
桶是在最后才加上的。先有了图片和模型,然后上材质。
REAL PICTURE
实物图
CINEMA 4D RENDER:
C4D渲染效果:
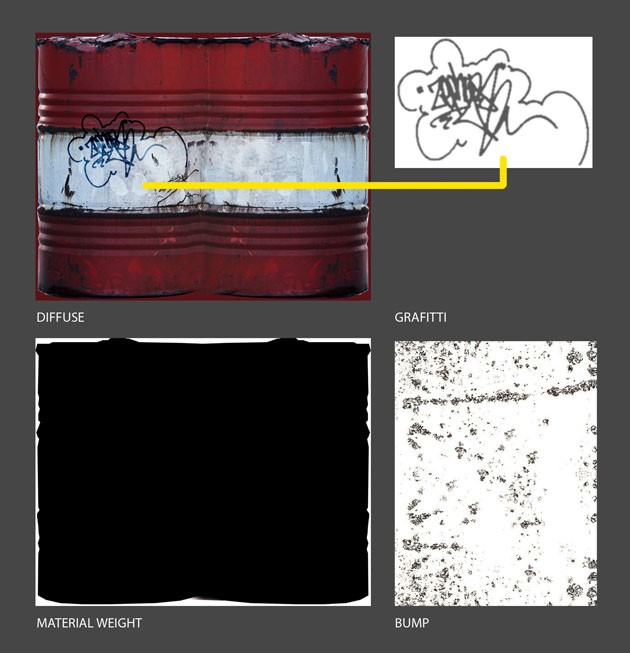
The texture map was something like this:
贴图是这样的:
We joined two textures because the first didn’t have graffiti painted. Eventually some of the graffiti was lost on the ground by the snow.
我们将两个材质融合,是因为第一个没有画涂鸦。
最终一些涂鸦被地上的雪覆盖了。




















好棒好棒
ths!
感谢分享!