
Making of Tribute to H&DEM
作者:François (Frankoi) RIBOULEAU
原文出处:http://www.ronenbekerman.com/making-of-tribute-hdem-sketchup-v-ray/
翻译:menboy2003(本站翻译小组成员)
Making of Tribute to H&DEM
I’ve noticed more great visuals being done recently using the SketchUP + V-Ray combo. The latest v2.0 release surly contributed to this bump with many great feature additions making the SketchUP native plugin much more
capable and not so far from its bigger brothers on 3dsmax & Maya. It is also important to note that most of these visuals are being made by architects
that use SketchUP for their design process… they are not professional visualization artists first. François (Frankoi) RIBOULEAU is one of them and
his tribute to H&DEM 56 Leonard Street project captured my attention. His process is simple and the result is great looking. Enjoy the read and tell
us what you think in the comments section.
最近我注意到使用SketchUP + V-Ray组合会获得更好的视觉效果。最新v2.0的新功能使得SketchUP有着不亚于3dsmax&Maya的表现力。同样需要注意,这些视觉效果是由建筑师使用SketchUP在其设计过程中建立的…他们不是专业的视觉艺术家。François (Frankoi) RIBOULEAU就是其中之一,他的H&DEM 56 Leonard Street项目吸引了我。过程简单,效果漂亮。享受阅读,请在评论中告诉我你们的想法。
Introduction 介绍
This model is a personal creation inspired by the 56 Leonard street project designed by architects Herzog & De Meuron.
模型是个人建立,灵感来源于建筑师Herzog & De Meuron 的 56 Leonard street项目。
I chose to build this model to test my ability to create a complex building quickly with SketchUP by using some very useful tips.
我选择建立这个模型来测试我用SU快速建造复杂建筑的能力。当中我使用了一些很有用的窍门。
I think that SketchUP offers a lot of solutions to make everything you can imagine, especially with the latest new SketchUP Make and all the plugins available for it.
我想SU为你建立所有想象事物提供了大量的解决方案,尤其是最新的SketchUP Make和一些适用的插件。
V-Ray is one of the best render engine you can use today, and with the latest update to their SketchUP plugin, offers remarkable possibilities considering this combo.
VR是目前最好的渲染引擎之一,并且使用最新的VR-SU插件,可达到卓越的效果。
Thanks to Ronen Bekerman for his interest in my work and inviting me to showcase my process here, I hope this making-of will help the SketchUP + V-Ray users among you… maybe some none SketchUP users will consider using it more too.
感谢Ronen Bekerman对我作品的兴趣,并且邀请我在这里展示我的过程,我希望这篇教程能帮到SU+VR使用者,或许一些非SU用户也会考虑使用它。
Modeling 建模
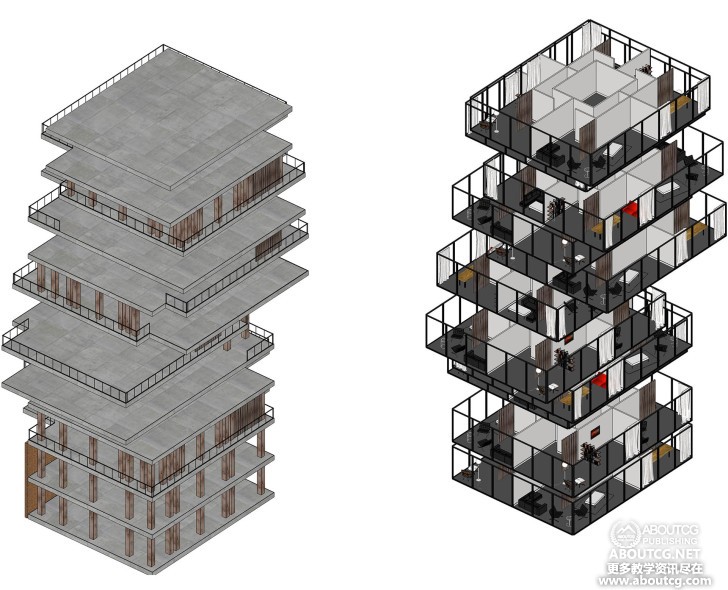
To create my model, I chose to make only one stage by creating a component. The idea was to make a stage with all the furniture objects inside
and to assemble the tower by an addition of rotation and mirror scaling to disturb the perception, to suggest that each stage was unique.
创建模型的过程,我只创建了一个层组件。当时的想法是在层中做好与所有内部家具和部件,并且组装,通过旋转,镜像缩放来打乱外表,表明每个层是独一无二的。
This solution makes modification of the composition very easy since adding new elements to one comportment updates all the others. I could also
change the actual building stage and it will reflect across its height.
这个解决方案使修改组合很容易,因为新元素添加到一个组件,会自动更新给所有其他的。我也可以改变实际的建筑层,它将反映在它的高度上。
Once each floor was created, I just made a concrete structure by a succession of concrete slabs. The size and disposition variation created all the balconies.
当创建好每层楼,我就使用混凝土板创建混凝土结构。大小和性格变化创造了所有的阳台。使用不同大小不同放置来创建所有的阳台。
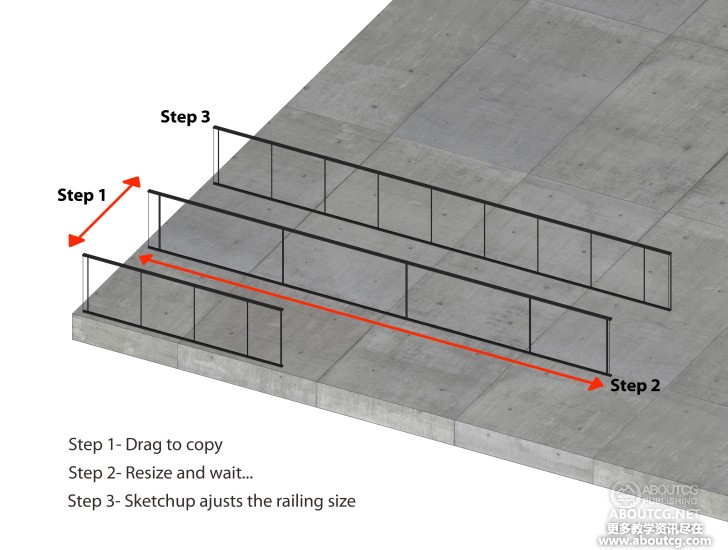
Let’s go back to the making of the glass railing. I have used a tip with a dynamic component you can find in SketchUP (the fence component). I modified
it by deleting all the bars, replaced it by a glass plane and changing the shape of all the profiles. This way I ended up with my own dynamic component.
This type of component can be really powerful, as it can hold within itself information that changes the geometry based on interaction, scaling, etc.
让我们回到玻璃栏杆的制作。我使用了一个动态组件,你可以在SketchUP(围栏组件)中找到。我删除所有的条状,用玻璃片替换它,并且调整所有轮廓。这样我最终得到了自己的动态组件。这种类型的组件很强大,因为它可以在几何体改变时保持自身信息,基于交互,缩放等。
步骤1 – 拖拽复制 步骤2 – 调整大小 步骤3 – SU调节栏杆尺寸
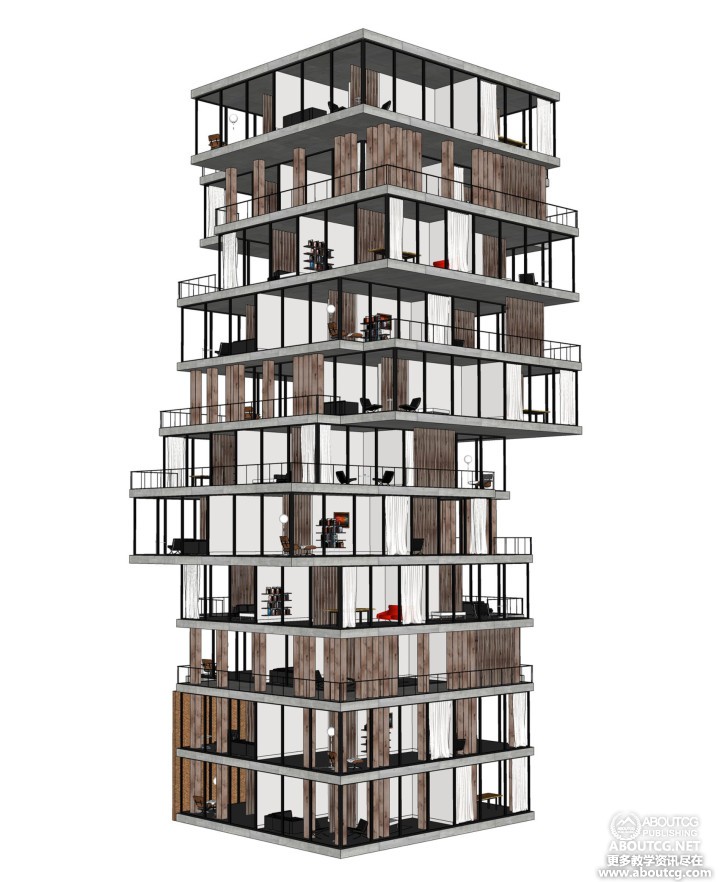
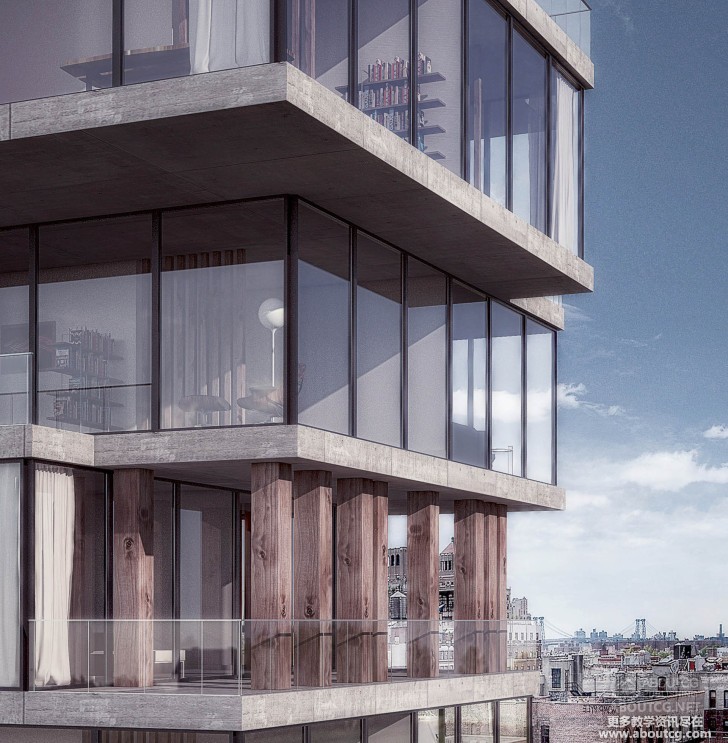
You can see the result of the final structure in the render point of view.
你可以在渲染视图中查看最终建筑的效果。
Texturing 贴图
The principal textures used for this model are very simple. It wasn’t the main focus of here, so I did not went deep into it. This will probably be the
subject of a future personal project. Below is a zoom view on the building…
主要用到的贴图很简单。它不是这的主要焦点,所以我没有去深入。这可能是未来个人项目的主题。下面是一个放大的建筑视图…
CONCRETE 混凝土
1 diffuse picture with a good definition 良好分辨率的diffuse贴图
GLASS 玻璃
Reflect layer with a texFresnel with IOR 1,6 and Refract IOR 1,6
反射层texFresnel IOR1,6 ; Refract IOR 1,6
WOOD 木头
1 diffuse layer with a High Definition jpeg 一个diffuse层,高分辨率jpeg
1 bump 一个bump贴图
For this scene, the V-Ray settings are :
这个场景的VR设置如下:
- Output : 4000 x 3250 输出:4000×3250
- Channels : 通道:
- RGB color
- Reflection
- Alpha
- Primary bounces 1,0 Irradiance 一级反射1,0 Irradiance
- Secondary bounces 1,0 Light cache 二级反射1,0 Light cache
- Physical Camera is on : 物理相机开启:
- Type : Default 类型:默认
- F-number 8,0 光圈8,0
- Shutter speed 200 快门速度200
- No vignetting 无渐晕(暗角)
- Environment : 环境:
- GI is on with a 1,0 factor and a skylight with intensity 1.
开启GI,1,0 factor ;天光intensity 1。
- Background is off. 背景关闭。
- V-Ray Dome Light is on with a HDRI sky.
VR圆顶光开启,带有HDRI贴图。
If you use a dome-light, your model will be smartly lighted but if you add a skylight, your shadows will be more intense. The way to have more
realistic render is to turn your dome-light texture in the same orientation as your skylight.
如果你使用圆顶光,你的模型会被漂亮的照亮,但是如果你添加一盏天光,你的影子会更强烈。为了得到更真实的渲染,圆顶光的贴图要和天光的方向保持一致。
You can see here the V-Ray render :
你可以在这里看VR渲染:
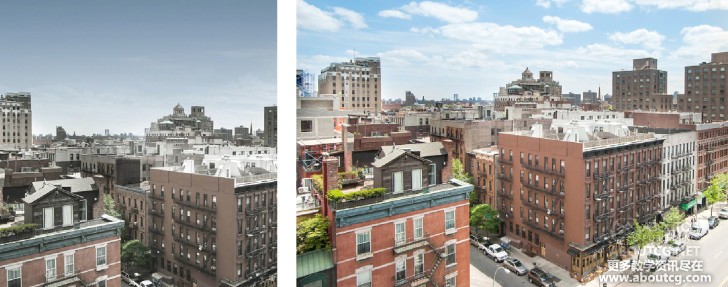
I found the background picture (right picture) on the internet but I cropped it and modified contrast and sky to fit my project (left picture).
我在网上找了一张背景图片(右),我剪裁并且调整对比度和天空来匹配我的项目(左)。
I couldn’t find out who took this picture, but here’s a link to the original location where I found it.
我不知道是谁拍了这张,但是这里是原始链接。http://www.blocksy.com/nyc/sale/92046-110-third-avenue-9d#/0
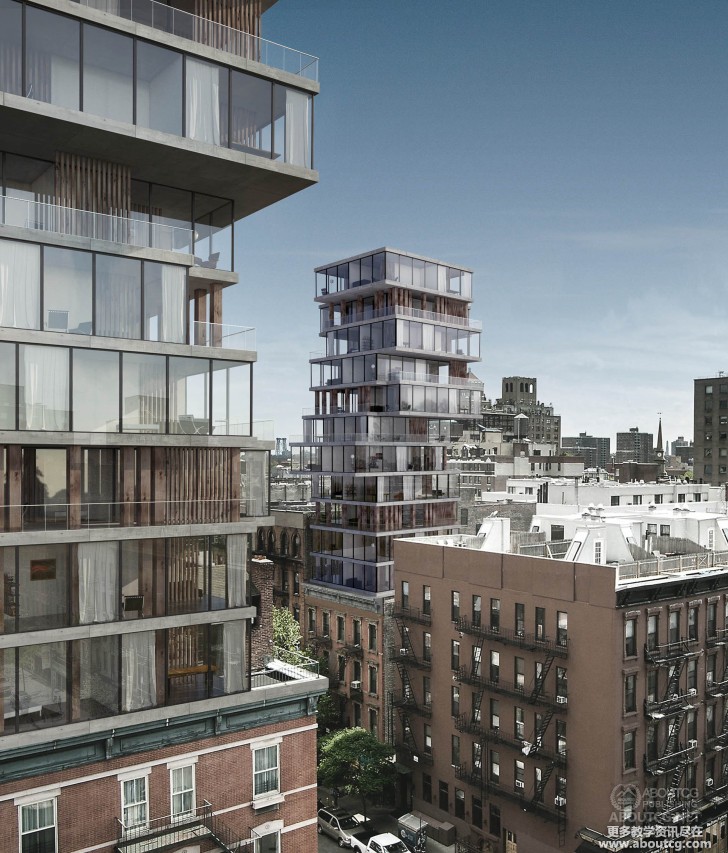
I’ve inserted the V-Ray render into the scene.
我在场景中插入VR渲染。
This picture did not satisfy me because the tower was to far to appreciate the interior of the model, so I added the second extension in the foreground.
这张照片没有满足我,因为塔太远了不能展现模型内部,所以我在前景添加了第二个扩展。
I used the reflection render to give more light on one face of the building.
我使用了反射渲染,在建筑表面得到更多光线。
To give more realism I added some reflections by using a part of the background with transparency on the building facade.
为了更真实,我添加了一些反射,通过在建筑立面添加部分透明背景。
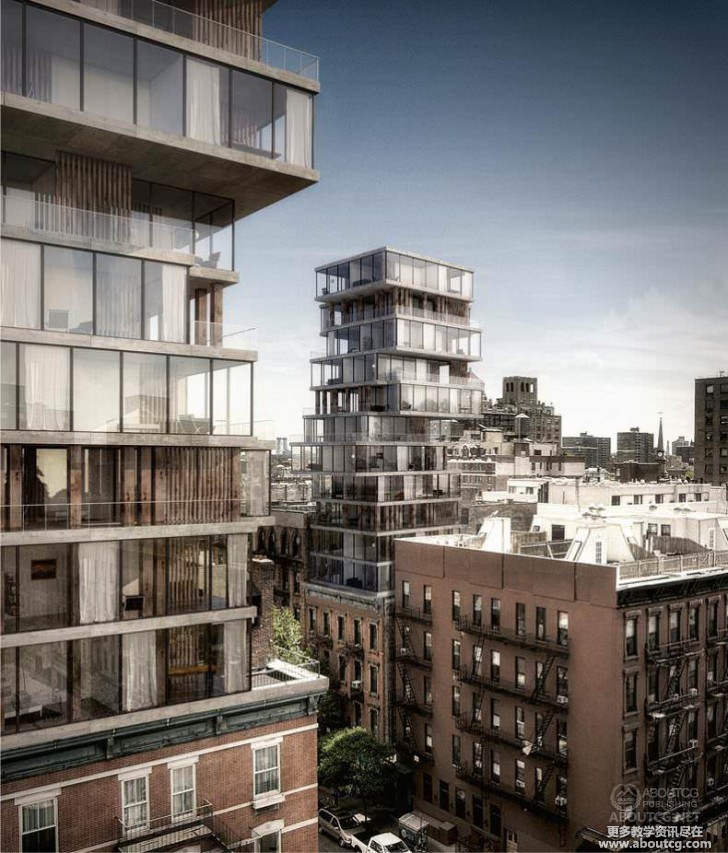
For additional color effects I used the excellent Photoshop plugin by Nick Software to finish my work.
额外的色彩效果我使用了碉堡的Nick Software PS插件来完成我的作品。
My favorite filter : 我最喜爱的滤镜:
Glamour Glow – Gives a soft light touch you can change cold or warm.
提供柔和泛光,你可以调节冷暖。
Details Extractor – Good to enhance your shadows.
良好地增强你的阴影。
Photo Stylizer – Gives your picture a color unity with very good tones.
让你的图像有良好统一的色调。
Vignetting – Darkens the corner of your render to focus on the center.
生成暗角。
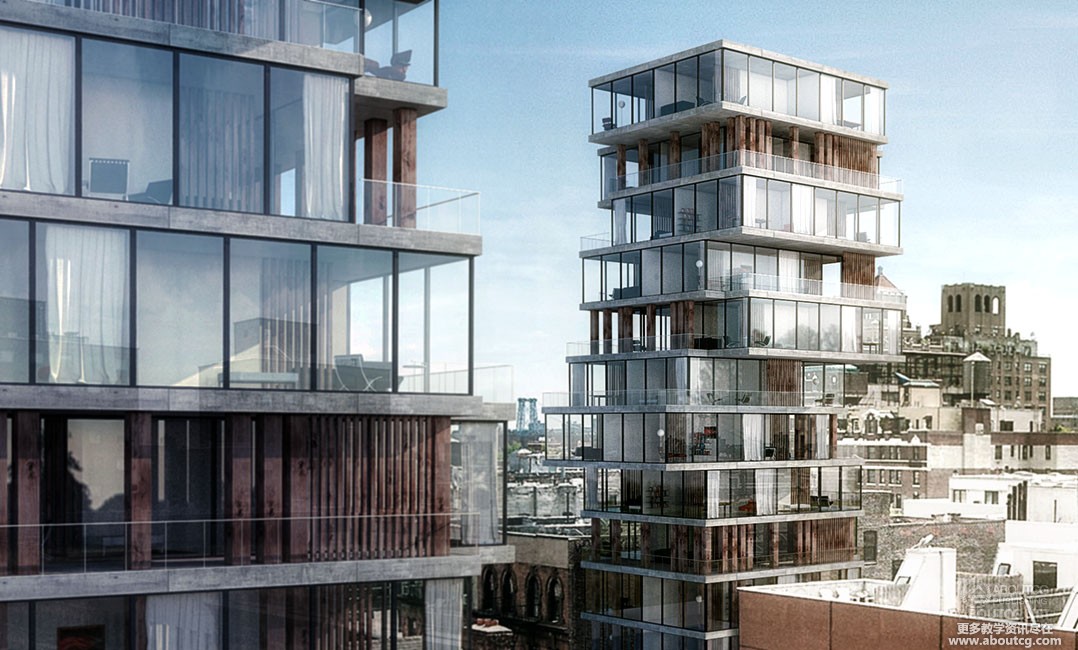
And this is the final result…
这是最终效果
And this is it!
至此结束!
Many thanks for reading, and do comment below…
感谢观看并且发表意见!
Frankoi.
















0回复Making of Tribute to H&DEM"