
Gunnery Sergeant Thomas Highway
军官 Thomas Highway肖像制作流程
原文来自:http://www.cgarena.com/freestuff/tutorials/max/thomas_highway/sergeant.html
作者: Stanislav Klabík, Czech
翻译: 眯眯眼
有问题可以参与答疑
Hi all, my name is Stanislav Klabík and I would like to show you the process of making of my latest personal project named “Gunnery Sergeant Thomas Highway”
I really like the movie Heartbrake Ridge where Clint Eastwood play a really tough drill instructor
who is in war with marine corps in his platoon so I decided to make a some nice portraits of him.
大家好,我的名字是Stanislav Klabik 我很高兴能给你展示我的最新角色作品:Gunnery Sergeant Thomas Highway.
我很喜欢Hearbrake Ridge这部电影。Clint Eastwood饰演一个参与海湾战争的排中的严格坚韧的教官,所以我决定为他做一个细致的肖像。
Modeling:建模
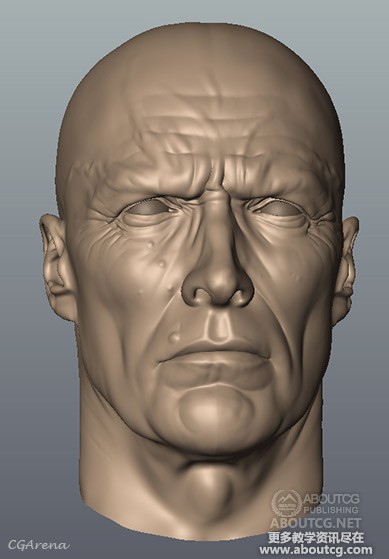
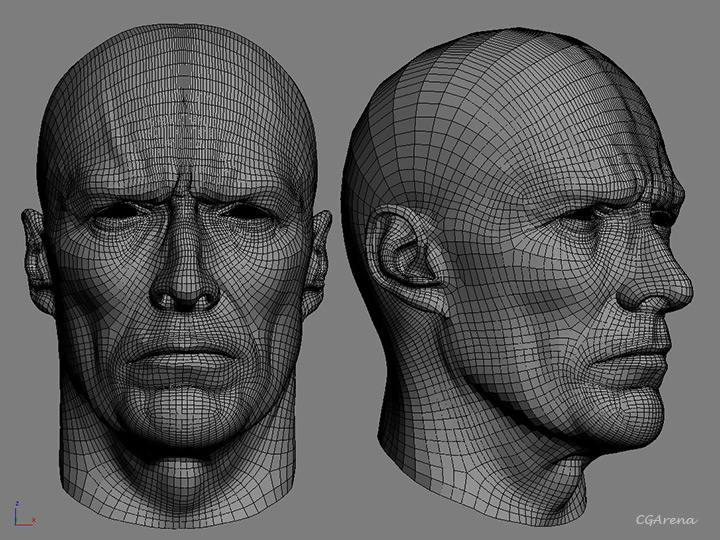
I used a simple head model for the first modeling. When I was satisfied with the result, with the base proportions of Eastwood´s face, I used this highpoly model for modeling a new topology with using the great Polyboost scripts. I used a bit heavy polycount for
his head to achieve all major proportions of his face, because I planned to make some facial animations.
我使用一个简单的头部模型作为基础模型。当我制作好基础模型比例与Eastwood的脸相似,我使用这个高模制作了一个新的拓扑模型使用强大的POLYBOOST插件,我为脸上的比例制作花费了比较多的精力。因为我计划为脸部制作一些动作
Base Sculpt:基础雕刻
New Topology:新拓扑模型
Then I made a simple rig for the head and turned his head to different position, then I took this model to Mudbox and added all details like wrinkles, pores and etc. I didn´t used the displace for final render, because there was a huge difference between the FastSkin+Displace and between the FastSkin without displace implemented, don´t know why, but these shaders looks totally different in quality despite the same settings. The hairs and the facial fur like the eyebrows and e
tc. were made using the incredible slow Hair and Fur using a several maps to modify the hairs placement, length, thickness.
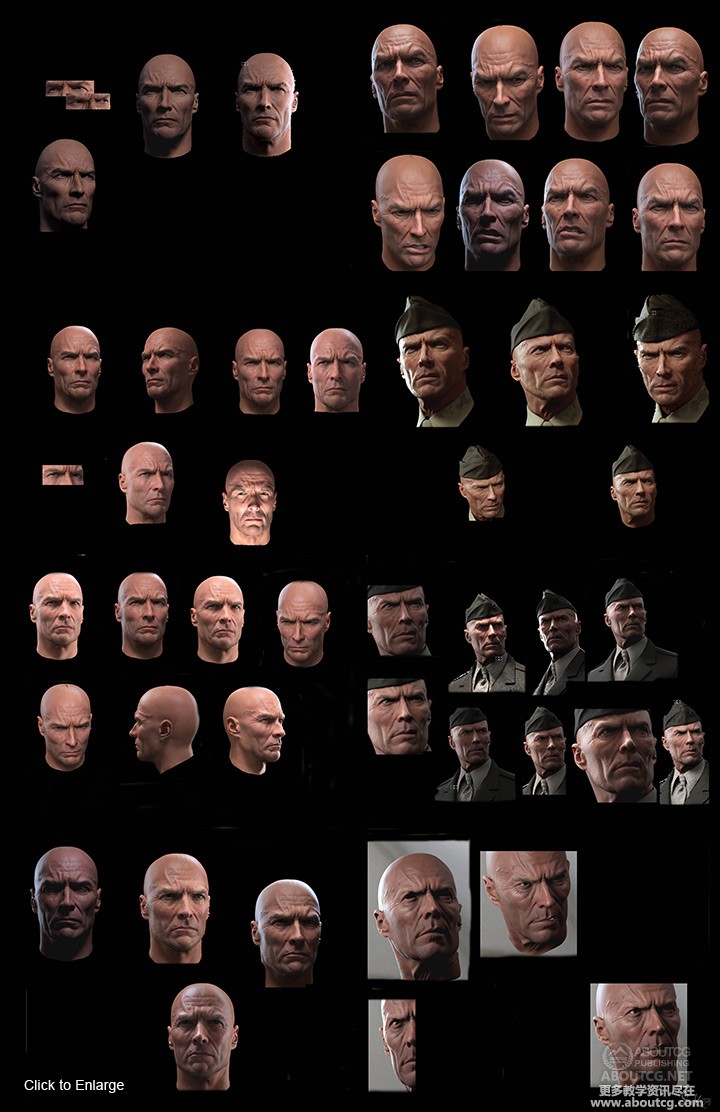
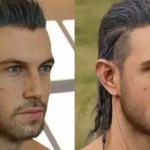
Here you can see the evolution of Clint
我为头部制作了简单的控制器,然后摆出不同的造型,然后我把这模型导入MUDBOX增加皱纹,毛孔等细节。我在最终渲染中更没有使用置换,因为在使用FastSkin+Displace和FastSkin没有使用Displace的时候差别很大。我也不知道为什么。在同样的设置参数下阴影有很大的区别。一些毛发和皮肤上的软毛和眉毛我使用非常缓慢的毛发系统来调节厚度长度。
这里你可以看到Clint的变化过程。
Final Head
最终头部
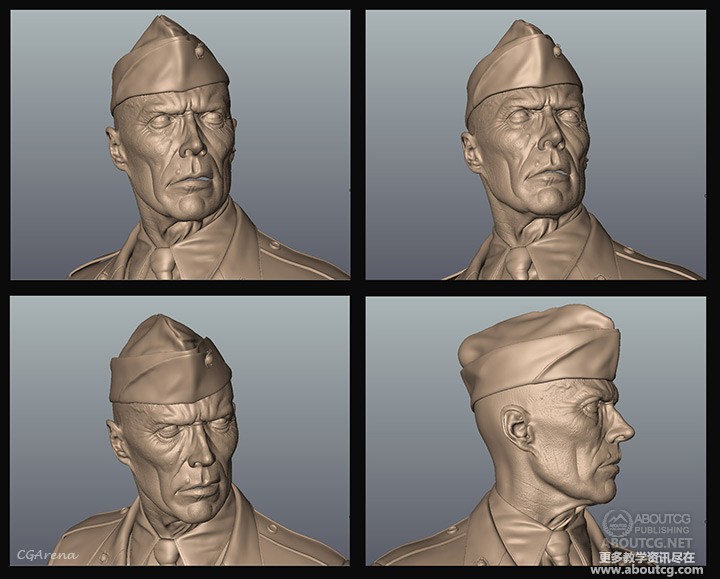
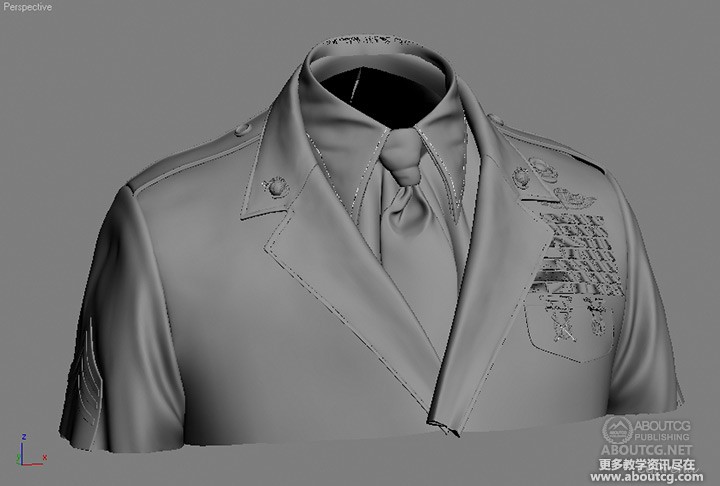
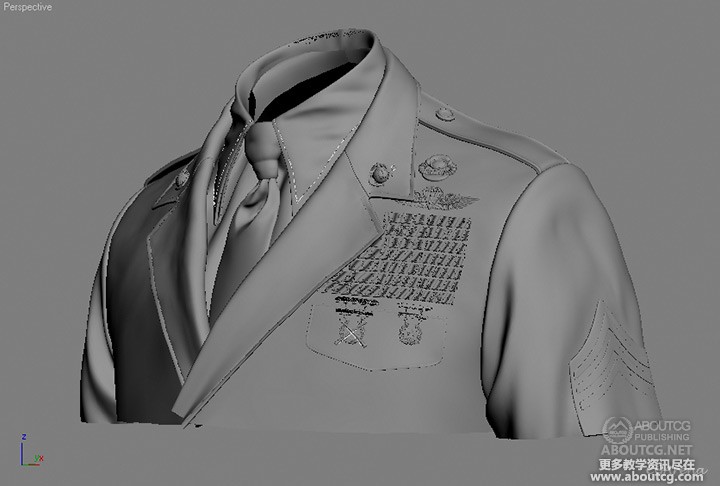
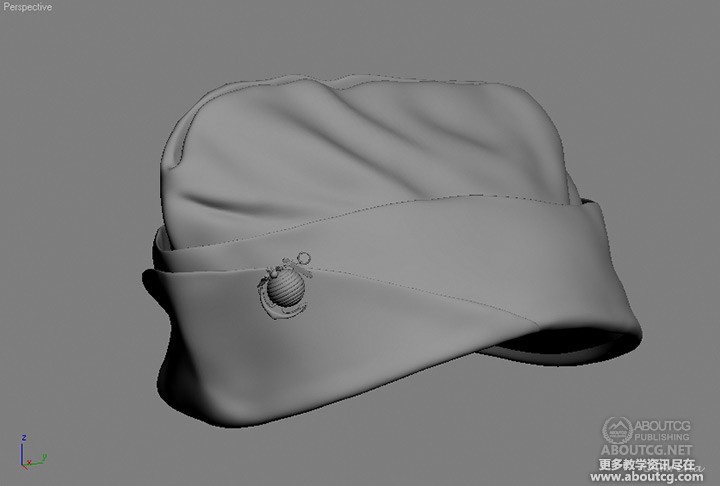
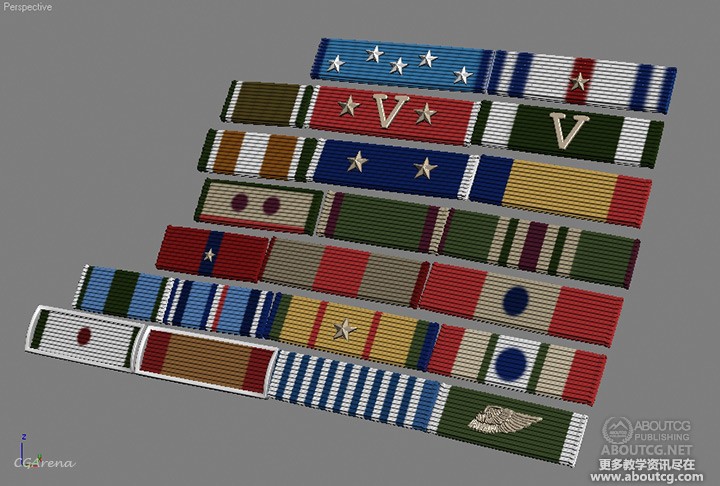
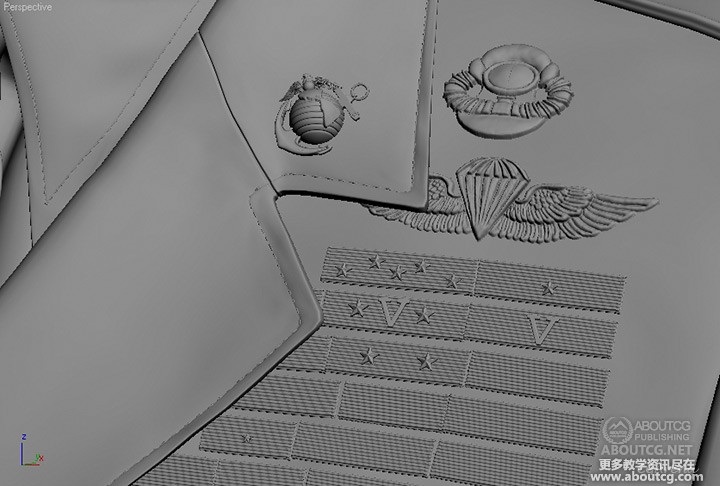
Then I started a modeling of the cloths, I used the same screens from the movie as for the head. The hardest part were the ribbons and his badges,
because I am not skilled in marine corps awards and the screens were to small to see what awards he has, I spent quite a long time with looking o
the screens and with searchnig for right awards using right words via google.
然后我开始制作衣服,我使用刚才制作头部时候使用的电影场景做参考,最难的部分是领带还有他的徽章。因为我不大了解海军陆战队的徽章和奖励具体是什么。而且场景中的图片过于小。我花了好长一段时间在谷歌上寻找关于真确的徽章和正确的名称。
The ribbons
色带
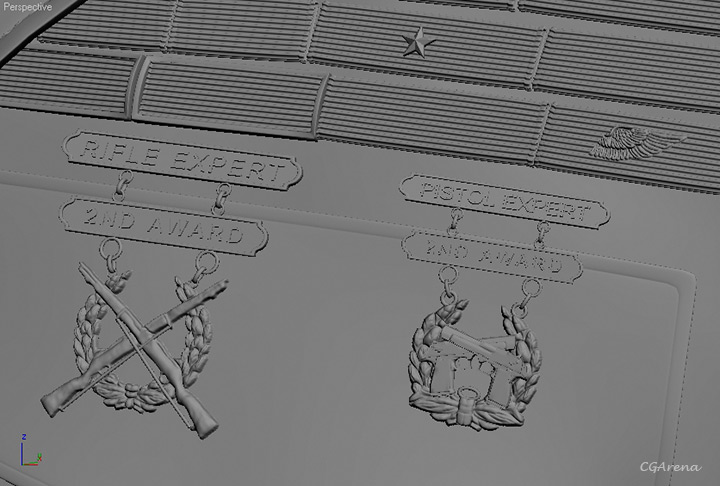
The metal badges were modeled really quick, I used googled images, tweaked them a bit in Photoshop and then used them as a stencils in Mudbox.
Then I tweaked the model for better shape and details, exported selected poylgons and that´s all, really quick way how to do these type of things and with great quality.
这些金属徽章制作相当容易。我使用谷歌图片。在PHOTOSHOP中打开他们制作为图案文件然后再MUDBOX中使用。然后我调节他们使之有好的阴影效果和细节。导出所以选出的模型,
这种方法很容易快速简单的制作出高细节的模型。
Background is based on the movie too, I changed only some small details. Some peoples were confused why I used so many polygons for windows and some other parts. That´s was beacause of quality, final render was a bit blured because of DOF, but there were a difference between the renders with background with sharp-edged objects and between the background with chamfered and smoothed edges. And I want as much quality as possible so I that´s why I used so many polygons for this simple background.
背景也是基于电影的,我只是改变了一些小的细节。很多人不明白我为什么使用如此多的面数在窗户和其他的一些地方。这是为了最终渲染效果的,因为最终的背景效果会有一些的模糊,
但是尖锐的棱角边缘跟圆润的棱角边缘还是会有很大的区别,我需要尽可能的体现的完美。于是我在简单的背景用了这么多的面数。
Eye Model:眼睛模型
exturing and Materials:贴图和材质
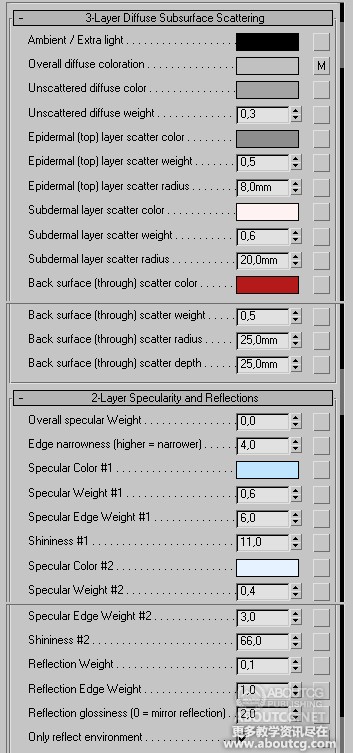
I did texture only for head and ribbons, for head I used color, specular and bump map. I used only overal color slot in FastSkin material, but you must know
what you are doing when you are using only this slot. I used only one color or the mix of two colors for the rest of the color slots in FastSkin material. When
I matched all color tones of his faces I did the rest of the maps. Textures for ribbons were really simple, only colors, everything else were made in geometry
我只为头部和领带制作了贴图。为头部制作了颜色,高光和凹凸贴图。我在FaskSkin材质只使用了叠加颜色,但是你必须知道你使用的这些图层有什么作用。我只使用一个颜色和另外的两个FastSkin材质的两个通道。,当我设置好材质的啥时候,我开始制作其他的贴图。领带的贴图非常简单。只是一个颜色,其他的就是模型了。
.
Head
For clothing I used again the FastSkin material with simple cloth texture with pattern, this provide the soft look and together with the small
strong bump provide the soft fuzzy look.
制作衣服我同样适用了FastSkin材质。使用简单的布料贴图和花纹。这使它看起来柔软而且强烈的凹凸带来毛茸茸的效果。
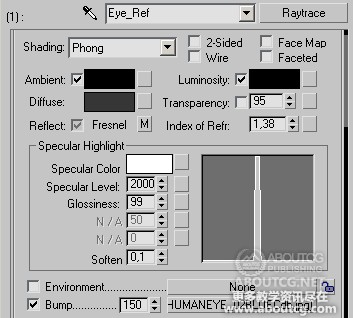
Eye use FastSkin together with the Raytrace material for the outer shell of the eye. Settings for the reflections is quite similar as Max Edwin has in his Song Hye-kyo project.
眼睛使用FastSkin材质使用Raytrace材质用于眼睛的表面散射。其他的设置于宋慧乔那个项目的参数类似
Lightning:灯光
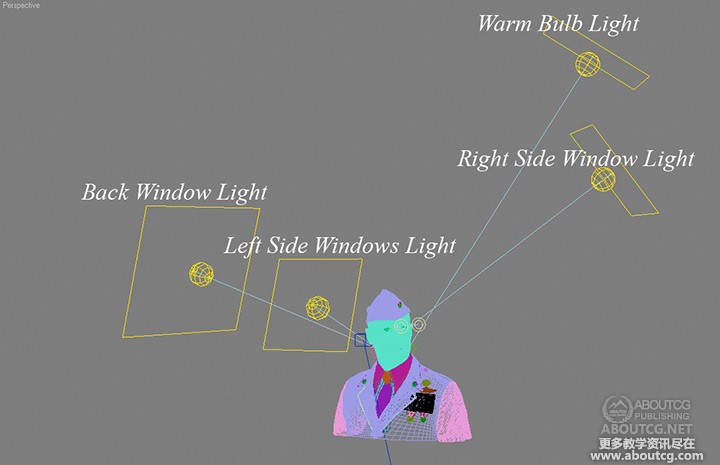
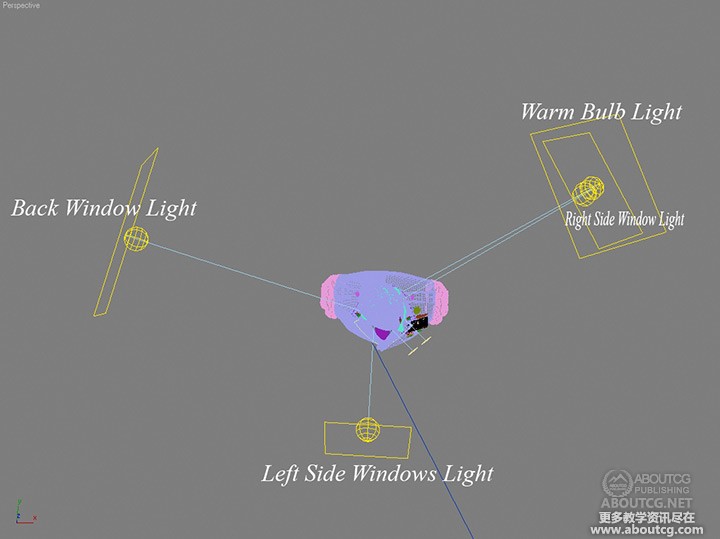
I used arealights, on the screens you can see their positions. The left side windows and the right side windows simulate light coming from the both sides of the room,
everything is the same as in the movie.Warm bulb light simulate warm light coming from above.
Back window simulate the light coming from window behind him. Light uses the raytraced shadows.
我使用同样的灯光。在屏幕上你可以看到他们的位置。左边的窗口和右边的窗口分别表象从房间的两边传来的灯光。一切都像电影中的那样。暖色调的等用来模拟从高处来的暖光。后面窗户来模拟从后面发来的光线。灯光使用共线跟踪阴影。
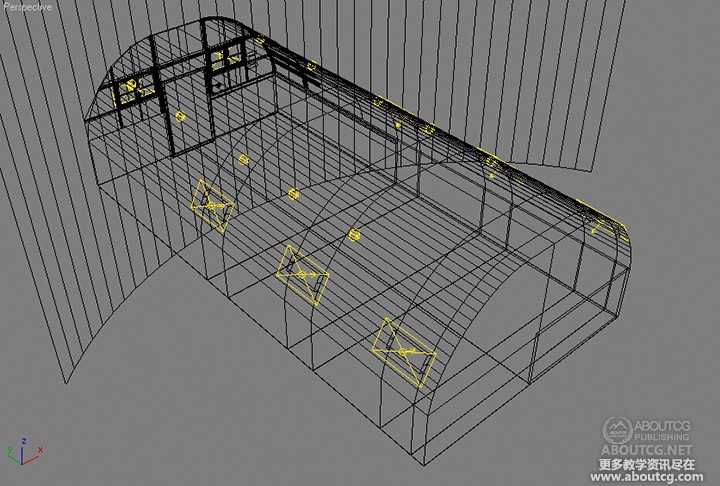
Background uses several lights.
背景使用阵列灯光。
Rendering:渲染
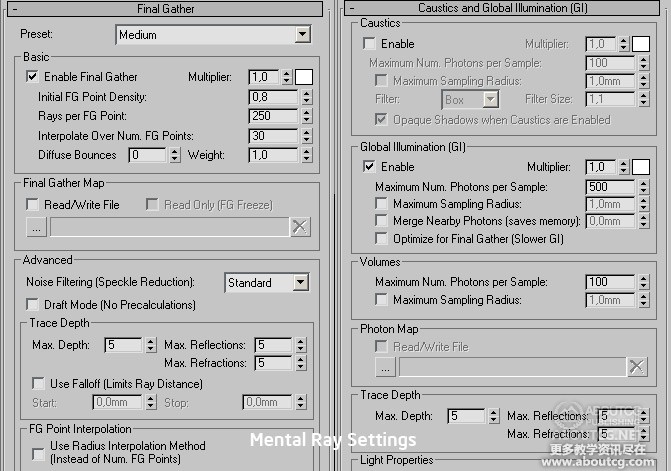
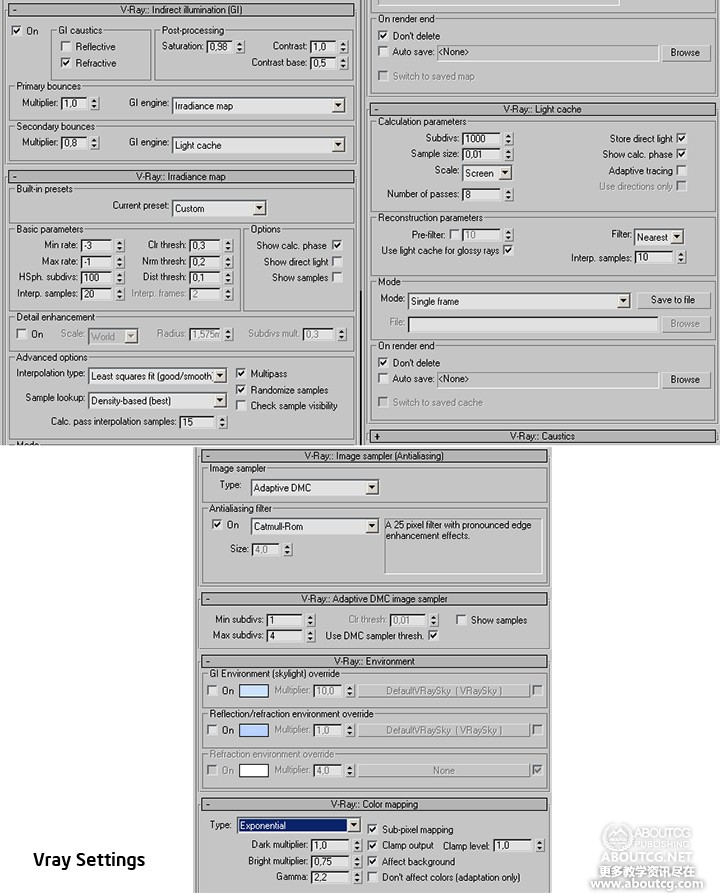
I used Mental Ray for character and Vray for background. I am not skilled in mental ray interior rendering and I din´t want to waste my time
with mental ray for interiors I decided to use Vray and match both scenes settings. For character I used camera with 130mm Lens
我使用MentalRay给角色渲染。使用Vray为背景做渲染。我不熟练于使用Mentalray渲染室内,而且我也不想花费太多时间在如何使用MENTALRAY渲染室内上。所以我使用VRAY渲染室内。我为角色设置了130mm的镜头效果。
Mental ray settings:Mental ray设置参数
Vray Settings:Vray设置参数
Postproduction:后期制作
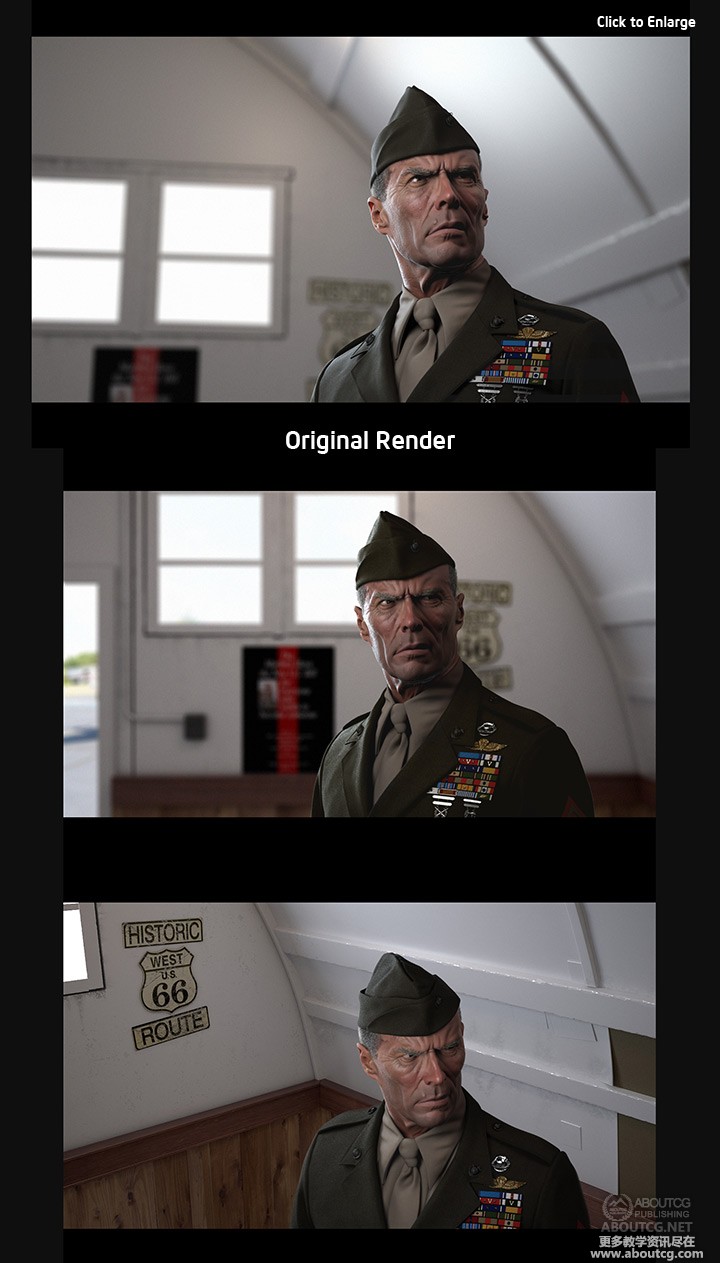
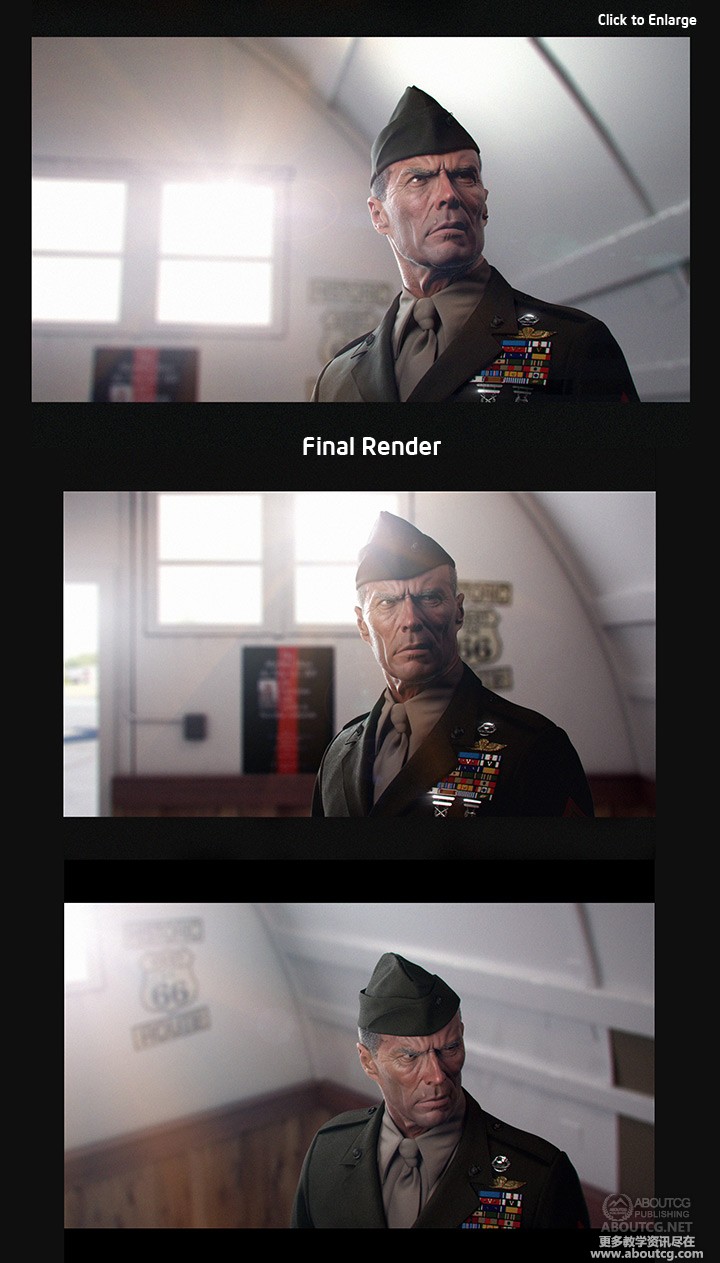
In Photoshop, there I did lot of tweaks to achieve a little bit specific look of 80´s movies. I tweaked the color balance, added a grain, at the end I added lens flare effect using the great Knoll Factory tools. But all the effect are only
a small and decent, because bad using of lens flare can kill your render sooner than you blink. I also added tiny facial fur, and tweaked some details.
在PHOTOSHOP中。我做了许多的调试使其看起来像八十年代的电影,我调整色彩平衡,增加一些颗粒感,最后我增加了镜头光晕使用强大的great Knoll Factory工具,最终我只使用了一些特效,因为一些镜头效果错误的使用会使缺点多过闪耀的地方。所以我增加了一些皮肤的软毛和增加一些细节。
Original render:最初渲染。
Final Render:最终渲染








0回复军官 Thomas Highway肖像制作流程"