
本教学为翻译教学,转载请注明来自aboutcg.net,以及注明翻译者
请尊重互联网道德,转载请注明aboutcg.net完整网站链接和翻译者,谢谢!
原教原始链接如下:
http://www.3dtotal.com/tutorial/maya/vray_maya_rendering_demo/vray_maya_rendering_01.php
作者: Dennis Holmboe
网站:http://subframe.wordpress.com/
翻译:单骑扫千军
VRay for Maya Demo by Dennis Holmboe
Hi everyone!
大家好http://www.chaosgroup.com – you have to create an account). Then just install it; simple as that!
首先,你需要到VRay官网去注册才能得到一个VRay For Maya,这很简单。
My name is Dennis and I just got my hands on the “VRay For Maya” demo! A friend asked if I could explain the basics, so here is a very simple tutorial.
我的名字是丹尼斯,我刚刚难道VRay For Maya的演示版,一个朋友要求我做个基本的演示,于是有了这个简单的教程。
First of all, if you haven’t already then get “VRay For Maya” from ChaosGroup (
To load the plug-in, go to Window > Settings/Preferences > Plug-in Manager. Then scroll down until you find “vrayformaya” and check both Loaded and Auto Load and press “close” (Fig.01).
到插件管理器去将vrayformaya插件load。
When that is done, hit the render Settings button and choose VRay (Fig.02)!
现在就能在渲染设置中找到Vray
Ok, so now VRay is loaded, and we are ready to set some preferences. First, as this is a demo, the resolution is locked to 600*450 and it only supports 200 objects in the scene.
好了,现在我们来设置参数,由于是演示版,渲染尺寸只能是600*450,场景只支持200个物体。

我的场景只是这些。
Under the “Indirect Illumination”tab, check “On”to activate Global Illumination. Under the “Irradiance map” settings, you can choose from different quality settings; “high” is for production. Keep in mind that for test renders it might be better to lower the settings to medium or low, to save time (Fig.05)!
在“Indirect Illumination”中打开GI,在“Irradiance map”设置中,你可以选择不同质量的设置,“high”是产品级别的,谨记在测试渲染的时候,最好使用比较低质量的设置,这样节省时间。
New render (Fig.06)!A feature under the “Settings” tab that can be useful is the “Adaptive Threshold” for production quality. Set it to 0.003. It reduces the noise pretty well. For test renders I sometimes go up to 0.5; it saves a lot of time! The default is 0.010 (Fig.07).
在“Settings”栏有个关于质量的“Adaptive Threshold”属性很有用,设置为0.003,这个能很好的减少噪点,在测试渲染的时候我将其设置为0.5,默认是0.010
Leave the “Translator” and “Render Elements” tabs to another tutorial!
我们另一个教程再讲“Translator” 和“Render Elements”
Ok, so we did just set up a basic GI environment. Now let’s add a light and also take a quick look at the VRay materials!
好,我们设置好了基本的GI环境,现在加上一盏灯去看看Vray的材质吧。
To add a VRay light go to Create > Lights > VRay Rect Light.
到Create > Lights > VRay Rect Light创建一盏Vray灯。
It adds a VRay light in the middle of the scene. Rotate and change the size of it as you wish, also you often have to lower the intensity (default 30) I used a value of “3” in my scene!
将灯光放置到场景的中部,按照你的需要其摆放它,作为测试渲染,将他的密度设置的低一点,默认是30,我设置为3。
U and V size depends on your scene. I changed the lights subdivs to “32” (Fig.08).
UV的设置需要取决于场景,我设置为30
Fig.08
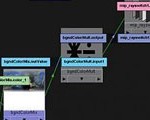
To create a simple chrome material, open up the “hypershade window” and select “VRay Mtl”. In the attribute editor change the color to black and make the material reflective (Fig.09 & Fig.10).
创建一个简单的chrome材质,打开“hypershade window”选择VRay Mtl”,在属性编辑器中调节颜色为黑色,调节器反射率。
And there we have it! You can see the light’s reflection in the chrome sphere; it can easily be turned off under the lights attribute by unchecking “Affect reflections”
现在我们在铬球上看到了灯光的反射效果,这个很容易取消,关掉灯光属性的“Affect reflections”。
If the light should block your view, check “invisible” in the attributes for the light.
如果灯光的形状挡住的实现,点击“invisible”,关闭可见。
Here is a quick test I did (Fig.12)! I hope that this simple tutorial can help you to get started with VRay For Maya!
这里是我做的简单的测试,我希望这个教程能帮助你了解VrayforMaya。
Cheers!
Dennis










0回复VRay for Maya教程"