
本教学由:小强子606翻译
Making of Young Girl
女孩的制做流程
昨天看到一个很好的教程,今天自己翻译了一下,发上来大家一起学习,翻译不好的地方,请大家多多包含.谢谢
教程作者是韩国人,英文名字叫Viki Yeo
http://blog.naver.com/yeo1981这个是教程作者的个人网页.
这个翻译仅供大家学习,绝不能用于商业用途.如需要转载,请注明: 小强子606翻译,谢谢
Introduction
介绍
Hi everybody!
My name is Viki Yeo. I’m from Korea and I’m a character artist for games. I am going to show you how I created my image “Young girl”. I used 3ds Max2008, Zbrush, Mentalray, Photoshop CS2 and reference images by http://www.3d.sk .
嗨,大家好!
我的名字是 Viki Yeo 。我来自于韩国,我是一个游戏美术行业的角色制作者。在这里我准备给大家展示我如何创作“Young girl”这个作品。我使用了 3dsmax 2008, Zbrush 、 Mentalray 、photoshop CS2 和参考图像来自http://www.3d.sk 。
Concept
想法
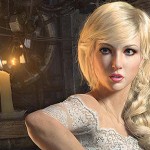
This model is a girl who is Petra by http://www.3d.sk . When I saw her, she is a very sad girl. So, I decided to create a sad girl.
这个模型是一个名叫 Petra 的女孩(来自http://www.3d.sk) 。当我看见她的时候,她是一个非常忧愁的女孩。因此,我决定制作一个忧愁的女孩。
Modeling
模型制作
I created a base mesh in 3ds Max. I began making the base mesh, just doing the minimum required.
我在max里面创建了基础模型。我开始制造基础模型,只是做了模型所需要的最低程度(个人理解为模型的布线和面数不用太多,适合需要就可以了)。
After I imported base mesh, I sculptured details on using Zbrush.
然后我导入基础模型到ZBrush,我使用 Zbrush 雕刻了模型的细节。
The displacement map has been created and saved as a 16 bit grayscale TIFF file in Zbrush.
这个置换贴图是在ZBrush里面创建和保存的16位灰度的tiff图像格式文件
I brought the mesh and displacement map in 3ds Max again.
When apply displacement map, do not forget to check “Use Existing Mapping”,
Switch on Luminance Center and put some strength.
我再次把模型和贴图导入 3dsmax。
当你使用置换贴图的时候,不要忘记检查 ” Use Existing Mapping使用现有的映射 “这个选项,
勾选Luminance Center这个选项,并调整数值
I add the Shell and turbosmooth modifier to sweater.
我在毛衣模型上加了shell和turbosmooth修改器
The Eye ball consist of 2 parts.
眼球是由 2个部份组成的。
Modeling Tip
模型制作 提示
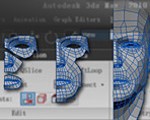
If you turn on Preserve UVs, you can perform minor editing tasks without changing the mapping.
Moved vertices with Preserve UVs off (left); Moved vertices with Preserve UVs on (right)
如果你打开了Preserve UVs(保护uv)这个选项,那你就可以实现调整模型的同时令uv的影射没有受到影响
移动顶点 Preserve UVs关闭的时候 (左图);移动顶点 Preserve UVs打开的时候(右图)
I Set camera and modeled face more in detail.
我设置了摄相机使模型的脸更好地展现出来。
Texturing / Shading
纹理│材质设置
I used Photoshop to make texture and I used a combination of real photos.
我用了photoshop制作纹理,同时我使用了一些真实的照片素材来组合。
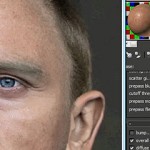
For the skin I used mentalray sss shader. So I had made a diffuse map, epidermal map, bump map and specular map for her skin.
对于皮肤,我用了 mentalray sss材质 。因此我为皮肤分别做了一张diffuse map颜色贴图、epidermal map表皮层的贴图,bump map凹凸贴图,SPecular map高光贴图
I used mental ray to render the scene. The material can be seen in the image. Here’s the material setting.
我用了mentalray渲染这个场景。材质可以在图片里面看到。材质的参数设置在这里。
Sweater were done with the mental ray architectural material.
毛衣是用Mentalray的architectural材质
Sweater detail
毛衣细节
Hair is important to a realistic character. I used Hair&Fur for creating the hairs. Hair&fur settings are showed on the image.
毛发对一个真实的角色很重要。我用了Hair & Fur创建头发。毛发和阴影的设置如图。
Lighting / Setting
照明│设置
I used 5 Free Area Lights with Final Gathering.
All my light and render settings are showed on the image.
我使用了5个Free Area Light和打开了Final Gathering
我的灯光和渲染参数设置如图。
Compositing
合成
The render times become crazy, so I found much easier to render the hair in a separate part, and then to combine them in photoshop.
渲染的时间使人发疯,因此我发现有些地方提取出来分开处理会比较容易渲染毛发,然后在 photoshop 中合成他们。
完,第一次翻译…..当锻炼一下吧……翻译不对的地方,欢迎大家指出呢







0回复女孩的制作流程"