
本教学为翻译教学,转载请注明来自aboutcg.net,以及注明翻译者
请尊重互联网道德,转载请注明aboutcg.net完整网站链接和翻译者,谢谢!
原教学原始链接如下:
http://www.cgarena.com/freestuff/tutorials/zbrush/prolapsed/prolapsed-eye.html
作者: Fausto Tejeda, USA Web: www.pixolclay.com
翻译:KanyaYan (www.aboutcg.net)
关于译者:
转载请写明出处和翻译者为KanyaYan,谢谢。
The image “Prolapsed Eye” was initially a sketch by a friend of mine: Yuri Sakovich www.thesakovich.com
这张图片的原稿来自于我的朋友Yuri Sakovich的草图,www.thesakovich.com
Modeling was very simple. I based my model off the original sketch and created what is known as an organized mesh. Meaning, that the topology of the model is in accordance to the muscle structure. Once that was done, I made sure to set the scale to my liking and imported into ZBrush to check it.
建模很简单。我根据草图的形象建造了基本的模型。同时,模型的拓扑结构是按照对象的肌肉结构来划分的。模型建造完成后,我确保模型大大小合适后就导入到ZBrush去检查。


UV’s – I took the base mesh and imported it into Unfold 3D, a UV Layout software. It gives me full control of my UV’s and has a very intuitive and user-friendly interface, apart from being incredibly fast.
UV’s-我把刚才建造好的模型导入到Unfold 3D中。Unfold 3D是一款UV编辑软件。他让我可以完全控制我UV,并且其界面也非常的直观和友好,除此之外他的速度也快得惊人。
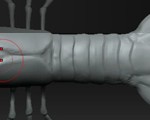
I then import the model into ZBrush and make sure that the UV’s are ok and that there are no overlapping UV’s (The image is completely grey and has no red areas).
接下来我把模型导入到ZBrush中并且确保UV没有问题,没有重叠的UV区域(就是图片全部是灰色的,没有红色的区域)
culpting雕刻
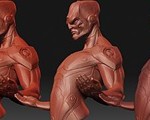
Sculpting in ZBrush was fairly simple and very straightforward. I used mainly the Standard, Move, Clay, ClayTubes and Smooth Brushes. I didn’t use any Alphas for sculpting; I usually prefer to sculpt all my detail by hand. It’s a challenge but the results are usually much nicer.
在ZBrush里面雕刻是相当的简单和直接的。我主要使用了Standard, Move, Clay, ClayTubes 和 Smooth Brushes这几个笔刷。并没有用道任何Alphas的来雕刻;我通常喜欢所有的细节都手动雕刻出来。这样虽然比较有挑战性,但结果常常会更好。
The Cloth was done in Maya and then sculpted in ZBrush as well.
衣服也是MAYA里面建造然后导入到ZBrush雕刻的。
Texturing纹理绘制
Texturing is one of the most creative and fun parts. I didn’t have any color scheme to work from so I used what I felt would match the character best. I looked at some reference images and came up with an organic like color scheme. Polypainting was used for texturing along with the dry-brushing technique. I used mainly the Spray Stroke along with Alpha 23. Once the base colors were applied, I then went over it with a very light coat of the skin color. The same applies to the cloth.
纹理的绘制是整个创作过程中最有创造力和有趣的部分之一。我并没有任何的配色方案做参考,所以我用我自己认为最能和角色匹配的配色,我观察了一些参考图片然后获得一些基本的配色方案。我使用Polypainting配合dry-brushing技术来绘制贴图。我主要使用Spray Stroke配合Alpha 23来完成。当基本颜色绘制完成后,我在皮肤的颜色之上绘制了一层薄薄的颜色。衣服的文理也是使用同样的方法完成。
Rendering渲染
First I had to export several Displacement Maps from ZBrush. I normally export 32-bit Displacement Maps, as they are very simple to use and give the best results. I use Displacement Exporter 3 with these settings
首先我要在ZBrush里面生成几张置换贴图。我通常输出的是32位的置换贴图,因为他们使用简单并且结果很棒,我使用Displacement Exporter 3的设置如下。
The Rendering process was somewhat tedious due to Maya’s incredible render pass system (…not). But the results were great. I exported a fairly high poly-count mesh, since this model will only be used for a still along with a simple Light Set-Up, using 2 planes as the main light source and 2 spotlights as kickers.
由于MAYA的复杂的render pass系统,渲染的过程比较烦琐。但是所得到的结果却很不错,我输出一个面数很高的模型,因为这里只是制作静帧并且灯光设置也很简单,使用了两个面作为主光,两盏聚光灯作为辅助光
I used the Mental Ray Skin Shader with a Scale Conversion of about 25 and maps for the Subdermal Weight, and Backscatter Weight and rendered with Final Gather. I made separate Render Layers for the Color, SSS, Occlusion, Specularity, Reflection, Shadow, and a Backscatter pass. (Color, reflection, Fresnel, and Occlusion for Cloth also).
我使用Mental Ray的皮肤材质,Scale Conversion设置为25.并且为Subdermal 权重,Backscatter权重连接的贴图。并且开启了Final Gather。
我创建了多个渲染层,包括Color, SSS, Occlusion, Specularity, Reflection, Shadow, 以及一个ackscatter 通道. (同样为衣服设置reflection, Fresnel和Occlusion层.)
I also rendered out a few black and white masks to use for compositing the cloth. I used Photoshop to put the image together. Here’s a better look at my layer blending modes.
为了后面合成衣服我也渲染了一张黑色和白色的遮照贴图。我使用Photoshop把分层渲染的结果合在一起。下面是详细的图层混合模式图解
Thanks everyone and hope you enjoyed the tutorial. For any questions just email me at Fausto@pixolclay.com or view my website at www.pixolclay.com
多谢各位观看并且希望大家喜欢这个教学,有问题可以发邮件给我Fausto@pixolclay.com或者到我的网站www.pixolclay.com也一样。
如果你对此文章感兴趣欢迎来到社区讨论:http://www.aboutcg.net/showthread.php?t=1485








0回复“犀利哥”的制作流程"