
Creating a “Velvet/Suede” finish with V-Ray or mental ray
通过V-Ray或mental ray创建“天鹅绒/绒面革”材质
作者网站:http://jamiecardoso-mentalray.blogspot.jp/
翻译:层层(ABOUTCG 翻译小组)
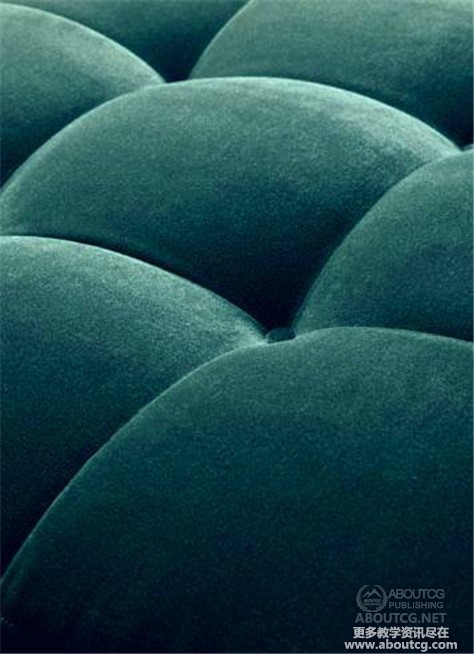
After few requests to post a tutorial about creating a velvet/suede fabric finish, I have managed to put something together.
很多朋友希望我发布关于如何处理天鹅绒/绒面革织物材质的教程,现在我作一些总结。
The following tutorial works for both V-Ray and mental ray.
下面的教程适用于V-Ray和mental ray渲染。
One of the most distinctive characteristics of the velvet/suede finish is its soft textured effect with two contrasts that transcend across the entire surface.
This effect is more noticeable on the edges/rim of the surface.
天鹅绒/绒面革最与众不同的地方在于它整个柔软材质的表面有着明暗两种反差。
这一特点在边缘处更加明显。
To emulate this material, simply do the following:
以下是材质模拟过程:
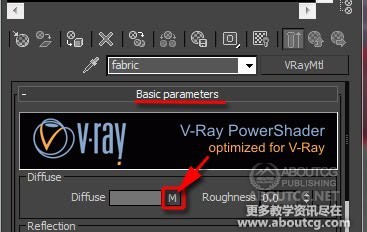
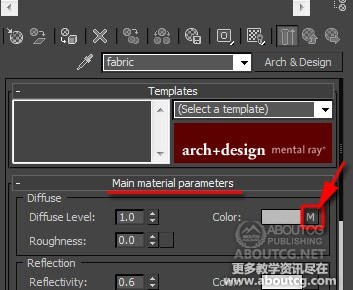
1- Go into your existing “Diffuse” map toggle first.
首先进入漫反射贴图。
Or
或者
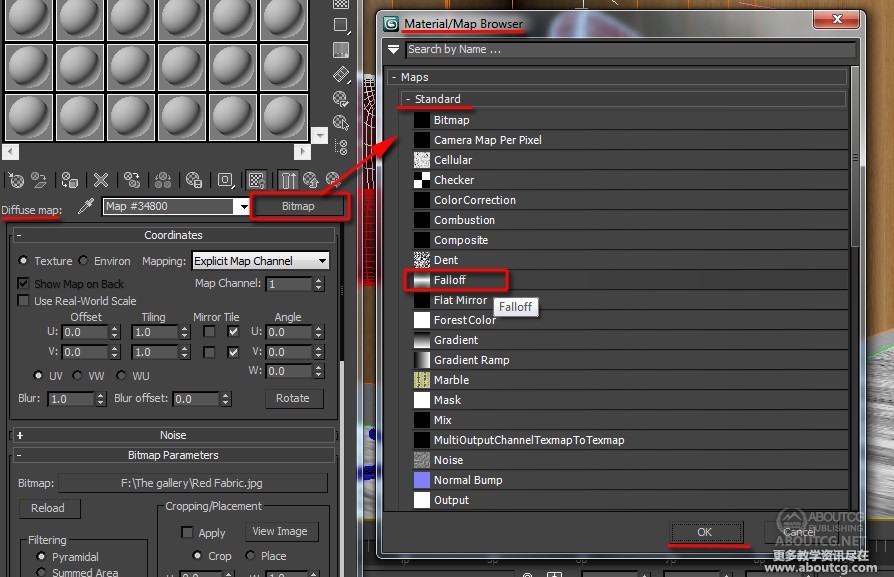
2-In the “Diffuse map” parameters, click on its “Bitmap” toggle to access the “Falloff” procedural map from the “Material/Map Browser” dialog. Double click to select it.
在漫反射参数面板,单击“位图(Bitmap)”按钮从“材质/贴图浏览器(Material/Map Browser)”中找到“衰减(Falloff)”贴图。双击选择。
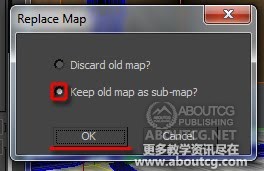
-The “Replace Map” dialog should be prompted. Choose to “Keep old map as sub-map” and “OK” to close the dialog. The “Falloff parameters” should be loaded.
弹出“替换材质(Replace Map)”对话框。选择“保持原有材质作为子材质(Keep old map as sub-map)”,然后“确定”,关闭对话框。“衰减参数面板(Falloff parameters)”会被加载。
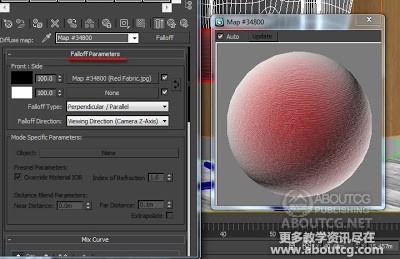
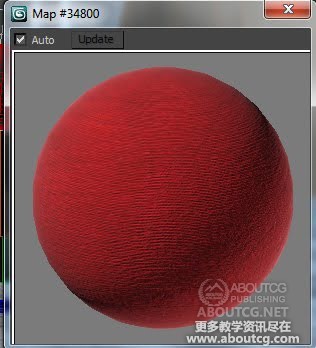
4-With the “Falloff parameters” loaded, one can clearly see its exquisite effects from the material slot thumbnail.
“衰减参数面板”加载之后,大家可以从材质缩略图中清晰的看到细腻的纹理。
The next phase is to create two variations of the same material in order to emulate the previously described “finish”.
下一步是为同一材质创建两个变量来模拟材质。
The “Color Correction” procedural map is one of many tools that can help achieve that:
“色彩校正”是众多可以完成这一效果的工具中的一种:
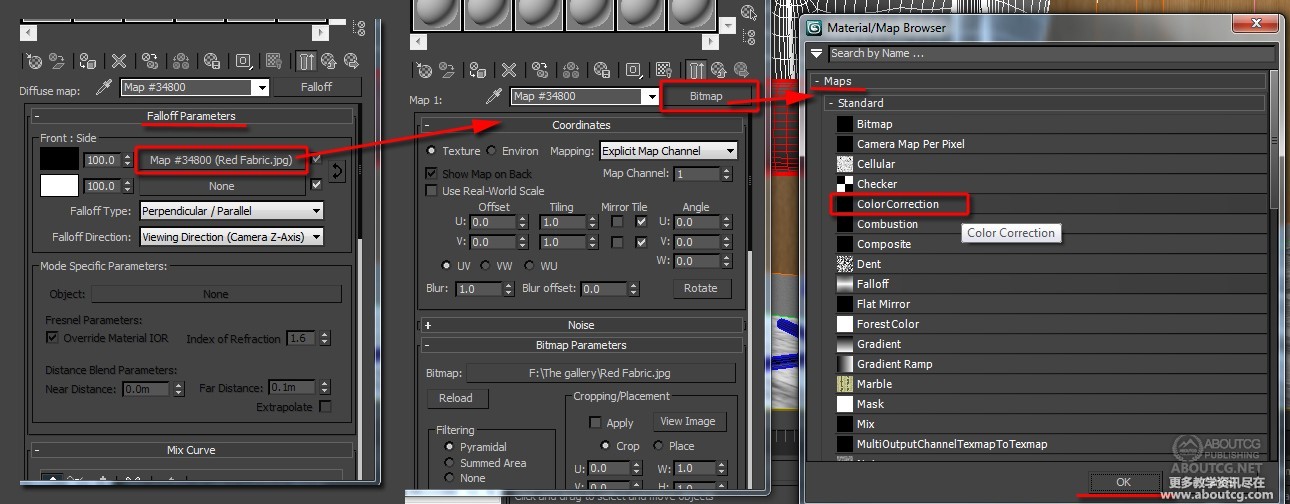
In the “Front: Side” group, click on the “Front” toggle to access its “Bitmap” parameters; followed by clicking on its “Bitmap” toggle
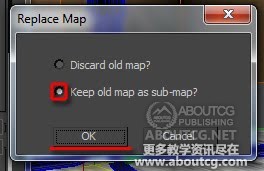
to choose the “Color Correction” map from the “Material/Map Browser” dialog. Also, choose to “Keep old map as sub-map” option
when the “Replace Map” dialog is prompted.
在“Front: Side”组,单击“Front”按钮进入“Bitmap”参数面板;单击“Bitmap”按钮从“材质/贴图浏览器”中找到“色彩校正(Color Correction)”。同样,在弹出的“替换材质”对话框中选择“保持原有材质作为子材质”。
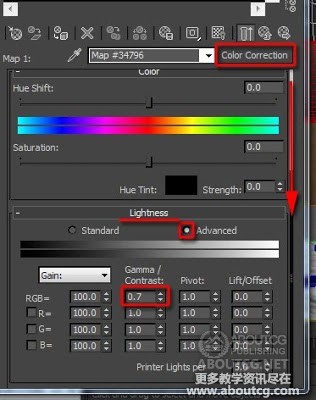
5- This procedural map offers a number of ways to control the texture. One of the most popular methods used by numerous
companies is to scroll down to the “Lightness” rollout and enable the “Advanced” function.
这一过程提供了一系列方法来控制纹理。被很多公司采用的最常用的方法是向下滚动至“Lightness”卷展栏,勾选“高级(Advanced)”选项。
Its parameters should come to life. Reduce its “Gamma/Contrast” “RGB” value to about 0.7 to darken its texture.
高级选项的面板被激活。减少“Gamma/对比度”“RGB”的值到0.7左右来使贴图变暗。
It’s worth noting that, this value worked well for the desired effect. However, one can try different values, if desired.
值得一提的是,这个值非常奏效。当然,你也可以尝试其他数值。
6- The next step is to use the same procedural map for the “Side” toggle, with reversed effects (i.e. brighter texture).
接下来对“side”应用同样的流程,达到相反的效果(例如使材质变亮)。
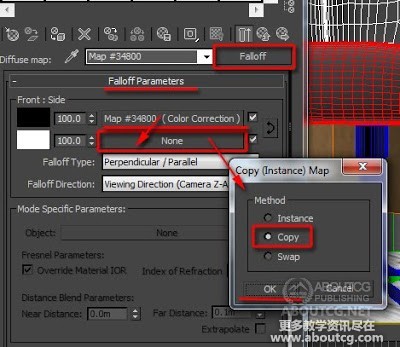
To do so, simple go back to the “Falloff Parameters” by clicking on the “Go to Parent” button first.
In the “Falloff Parameters”, drag the “Front” toggle contents and drop it onto the “Side” toggle.
The “Copy (instance) Map” dialog should be prompted; choose the “Copy” option and “OK” to close the dialog.
The “Copy” option was chosen because its parameters will be later changed.
要达到这一效果,先点击“转到父级对象(Go to Parent)”回到“衰减参数面板”。
在面板中,拖动“Front”按钮,在“side”上松开。
会弹出“副本(实例)材质”对话框,选择“副本(Copy)”,点击“确定”关闭对话框。
选择“副本”是因为稍后将调节面板参数。
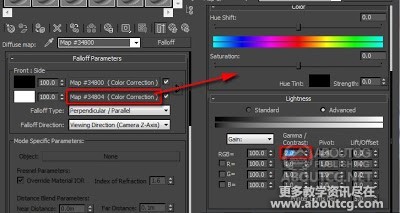
7- Next, go inside the “Side” toggle and increase its “Gamma/ Contrast” value to about 2.0.
Please note that this value worked well for the intended results. However, feel free to try different values, if desired.
下一步,进入“side”,增加“Gamma/对比度”的值到2.0左右。
值得一提的是,这个值对预期效果非常奏效。当然,你也可以尝试其他数值。
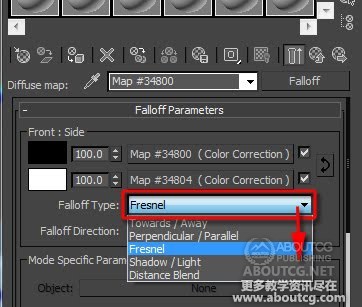
8-Finally, to ensure that the falloff is visible on the edges /rim of the surface, simply change its “Falloff Type” to “Fresnel” and render the results.
最后,为了确保可以看到边缘衰减,调整“衰减类型”为“菲尼尔”并进行渲染。
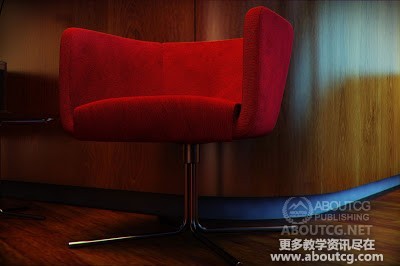
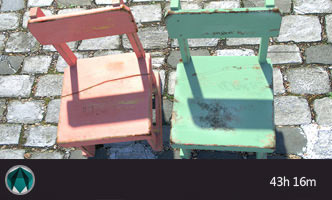
NO “Falloff” procedural map being used
没有衰减贴图
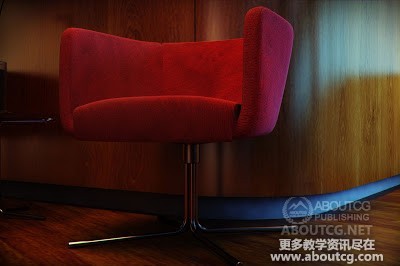
With “Falloff” procedural map being used
有衰减贴图
POSTED BY JAMIE CARDOSO
作者 JAMIE CARDOSO











0回复通过V-Ray或mental ray创建 天鹅绒/绒面革 材质"